
Pruning
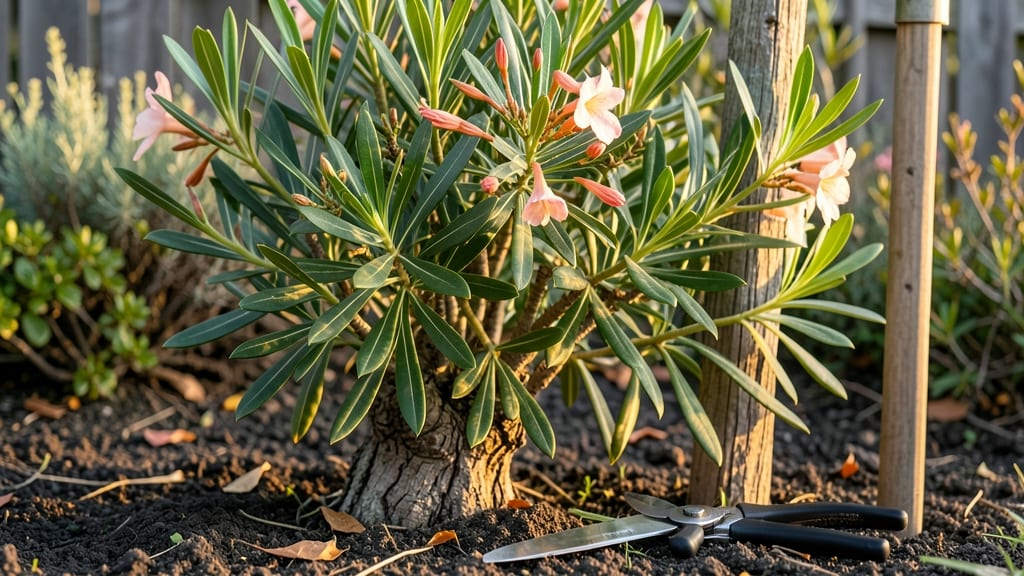
Pruning oleander plants transforms them from occasional bloomers into nonstop floral powerhouses. 🌿 I’ve seen my own oleander go from sparse, leggy branches to a bush bursting with blooms year-round—just by mastering the right cuts at the right time.
The key isn’t just trimming; it’s understanding when to encourage new growth and when to shape the plant for maximum impact.
You’ll need sharp pruners, thick gloves (that toxic sap is no joke), and a clear day to work. The best time to prune is right after flowering, when the plant naturally slows down, but light shaping can happen anytime.
Oleanders handle pruning better than most shrubs—just avoid cutting into old wood, or you’ll stunt future blooms. I’ve even pruned mine into a small tree shape, and it thrives.
After pruning, your oleander will reward you with fresh, velvety-green growth within weeks. The blooms return faster, the shape stays full, and you avoid the sad, bare stems that come from neglect. Just remember: never prune more than a third of the plant at once, or you’ll shock it.
The results? A bush that looks like it belongs in a tropical garden, not your backyard.
This works for both mature plants and young oleanders—just scale the cuts. Whether you’re shaping for formality or encouraging wild, bushy growth, the same principles apply. Let’s get those shears sharp and turn your oleander into a blooming machine.
📚 In This Guide
- What you need
- Instructions
- Tips and common mistakes
- Wrapping up and next steps
What you need
- ● Pruning shears: Bypass-style (not anvil), with sharp, sterilized blades (1 pair). Look for ergonomic handles for comfort during long sessions.
- ● Hand pruners: Bypass-type, for smaller branches (1 pair). Choose ones with a locking mechanism for safety.
- ● Loppers: For thicker branches (up to 1.5 inches in diameter) (1 pair). Opt for ratchet-style for ease.
- ● Garden gloves: Heavy-duty, cut-resistant (1 pair). Oleander has sap and thorns—protect your hands!
- ● Disinfectant: 70% isopropyl alcohol or rubbing alcohol (small bottle) to sterilize tools between cuts.
- ● Rubbing alcohol wipes: For quick tool cleaning (1 pack). Great for on-the-go sanitizing!
- ○ Pruning sealant: Optional but recommended for larger cuts (small bottle). Helps prevent disease.
- ● Garden twine or zip ties: For securing branches during pruning (small roll). Useful for training or shaping.
- ● Trash bag or bucket: For collecting pruned branches (1-2). Keep your workspace clean!
- ● Weather check: Prune on a dry, overcast day or early morning to avoid stressing the plant.
- ● Safety gear: Sunglasses (to protect from sap) and long sleeves (oleander sap can irritate skin).
- ● Water source: Hose or watering can nearby. Oleanders love a drink after pruning!
- ● First-aid kit: Just in case of minor scrapes or sap exposure (small kit). Better safe than sorry!
Step-by-Step guide to pruning oleander for continuous blooms
Here's how I keep my oleanders flowering beautifully all season long.
✂️ Step 1: Identify and Remove Dead or Diseased Wood
Start by examining your oleander for any branches that are brown, brittle, or showing signs of disease like black spots or powdery mildew. Use sharp pruning shears to cut these back to healthy green wood—you'll see a clear transition where the old wood ends and the new begins. This step is critical because dead wood doesn't produce blooms and can spread disease to healthy parts of the plant.
Make your cuts at a 45-degree angle, about ¼ inch above a leaf node or outward-facing bud. This encourages new growth in the right direction. If you're unsure which branches to remove, think of it this way: if a branch looks like it's struggling to stay alive, it's time to say goodbye. I always prune on a dry day when the plant isn't stressed from heat or drought.
✂️ Step 2: Deadhead Faded Blooms for Longer Flowering
Once your oleander's flowers start to fade and turn brown, it's time to deadhead. Use your fingers or clean pruning shears to pinch off the spent blooms at the base of the flower cluster. You'll notice the stems are woody and dry—this is your cue to remove them. Deadheading encourages the plant to produce more flowers by redirecting its energy from seed production to new blooms.
I like to do this every 1-2 weeks during the flowering season. The key is consistency—don't wait until all the flowers are gone. When you see 20-30% of the blooms on a branch fading, it's time to start deadheading. This keeps your oleander looking tidy and promotes continuous flowering throughout the season.
✂️ Step 3: Shape the Plant for Airflow and Light Penetration
Next, focus on shaping the oleander to improve airflow and light exposure. Start by thinning out the center of the plant to allow sunlight to reach the inner branches. Remove any branches that are crossing or rubbing against each other—this prevents damage and disease. You're aiming for an open, vase-like shape that lets light and air move freely through the plant.
Cut back any overly long or leggy branches by ⅓ of their length to encourage bushier growth. Make your cuts just above a leaf node or outward-facing bud. You'll see new growth emerging from these points in a few weeks. This step is especially important if your oleander has grown too tall or lopsided—it helps maintain a balanced, compact shape that's easier to manage and more productive.
✂️ Step 4: Light Pruning for Bushier Growth
For a fuller, bushier oleander, focus on pruning the tips of the branches. Cut back the top 2-4 inches of the current season's growth to encourage branching. You'll see multiple buds along the stem—these will develop into new shoots. This type of pruning is best done in early spring or after a heavy flowering cycle to rejuvenate the plant.
I always use clean, sharp pruning shears to make precise cuts. Dull shears can crush the stems, which can lead to disease. After pruning, give your oleander a light watering to help it recover. You'll notice new growth emerging from the pruned areas within 2-4 weeks, signaling that the plant is responding well to the pruning.
⏰ Step 5: Post-Pruning Care for Healthy Recovery
After pruning, it's important to give your oleander the care it needs to recover. Water deeply once a week during the growing season, ensuring the soil is moist but not waterlogged. Oleanders are drought-tolerant once established, but they'll appreciate the extra moisture after pruning. Apply a balanced, slow-release fertilizer every 6-8 weeks to support new growth and flowering.
Keep an eye out for any signs of stress, like yellowing leaves or wilting. If you see these signs, adjust your watering or fertilizing routine. Oleanders are tough plants, but they do best when given consistent care. With proper pruning and maintenance, your oleander will reward you with vibrant blooms all season long.
Tips & tricks for perfect oleander pruning
Pruning oleanders might seem intimidating, but these simple tricks will help you keep your plant thriving and blooming all season.
Tool Prep: Clean your pruning shears with rubbing alcohol before and after each use to prevent spreading disease between cuts. I always sterilize my tools after removing diseased branches in Step 1—this keeps your healthy wood safe. For stubborn cuts, a sharp pair of bypass pruners works best; avoid anvil pruners that can crush stems.
Visual Cue for Deadheading: In Step 2, look for the telltale sign of woody, dry stems when deadheading—these feel hard and papery compared to fresh growth. I like to pinch off blooms when about 30% of the flowers on a branch are fading, which happens roughly every 1-2 weeks. This timing prevents the plant from wasting energy on seed production.
Pruning Angle Matters: The 45-degree angle mentioned in Step 1 isn't just for looks—it helps water run off the cut and prevents rot. Make sure your cuts are clean and precise, about ¼ inch above a leaf node. If you're unsure where to cut, imagine drawing an invisible line from the branch to the outside of the plant—this guides your angle for better airflow.
Seasonal Timing Tip: For bushier growth in Step 4, early spring is ideal because the plant is just waking up and can handle the stress. If you prune in late summer, you might delay fall blooms. I always do my light pruning right after a heavy flowering cycle to give the plant a fresh start for the next round of blooms.
Pro Tips for Oleander Plant Pruning
- Pruning oleanders might seem intimidating, but these simple tricks will help you keep your plant thriving and blooming all season.
- Tool Prep: Clean your pruning shears with rubbing alcohol before and after each use to prevent spreading disease between cuts.
- Visual Cue for Deadheading: In Step 2, look for the telltale sign of woody, dry stems when deadheading—these feel hard and papery compared to fresh growth.
Frequently asked questions
Got questions about oleander pruning? You’re not alone! Here are answers to the most common concerns—from timing to tools—to keep your plant thriving and blooming beautifully.
When is the best time to prune oleander for maximum blooms?
The ideal window is late winter or early spring (just before new growth starts) to shape the plant and encourage fresh blooms. You can also lightly trim after flowering to maintain shape, but avoid heavy cuts then—it may reduce next season’s flowers. Pro tip: Avoid pruning in fall, as it can stimulate tender growth vulnerable to cold.
Do I need special tools to prune oleander?
Not necessarily! While sterilized pruning shears or bypass pruners work best for clean cuts, you can use sharp garden scissors or even a hacksaw for thicker stems. Just ensure tools are clean to prevent disease. Warning: Wear gloves—oleander sap can irritate skin!
What if I prune too much? Will my oleander die?
Oleanders are tough, but over-pruning (cutting more than ⅓ of the plant at once) can stress it. If you accidentally trim too hard, don’t panic! Focus on healthy stems and give it time to recover. Water deeply and fertilize lightly to support regrowth. Remember: It’s better to prune gradually than all at once.
Does deadheading oleander flowers help it bloom longer?
Deadheading (removing spent blooms) redirects energy to new flowers instead of seed production. Snip just above a leaf node or bud to encourage bushier growth. Bonus: It keeps your oleander looking tidy and extends the blooming season—sometimes until frost!
Can I prune oleander in hot weather?
Pruning in extreme heat (above 90°F/32°C) can stress the plant, but light trimming in mild summer heat is fine. If you must prune, do it early morning or late evening to reduce shock. Always water before and after to help recovery. Avoid: Heavy cuts during drought or heatwaves.
Wrapping up and next steps
Pruning your oleander isn’t just about keeping it tidy—it’s your secret weapon for vibrant, year-long blooms! 🌸 By mastering deadheading and strategic cuts, you’ll encourage lush growth, prevent disease, and enjoy that stunning tropical charm all season.
Now that you’re armed with the right tools and techniques, there’s no better time to roll up your sleeves and give your oleander the TLC it deserves.
Ready to transform your garden? Pick a sunny day, grab your pruners, and start pruning today! Your oleander will thank you with a show-stopping display of color and health. Happy gardening! 🌿