
Propagation
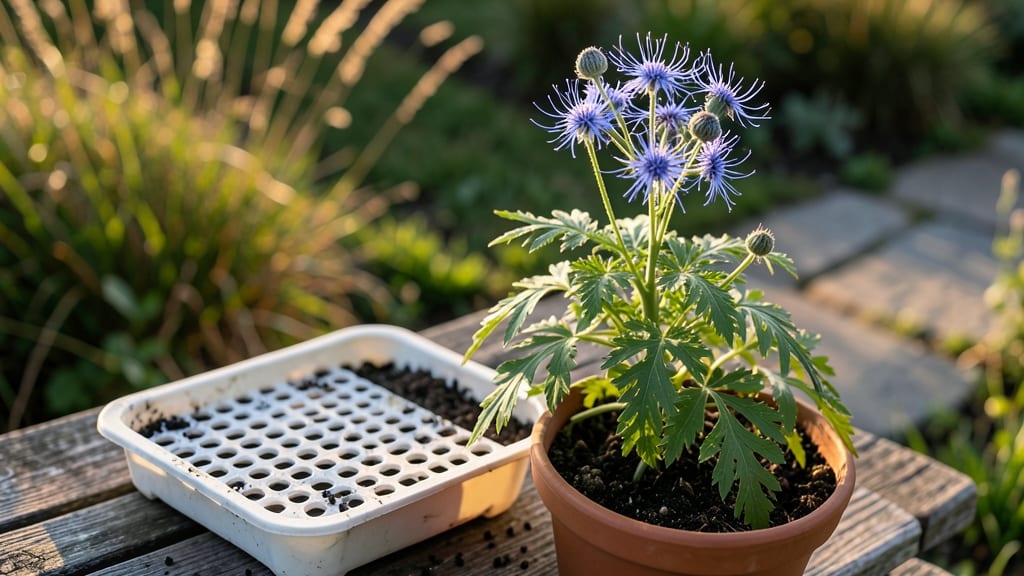
Planting nigella seeds is the easiest way to turn a corner of your garden into a pollinator paradise with almost no effort. 🌿 I’ve watched these delicate blue flowers transform bare soil into a buzzing, blooming oasis—all from seeds that barely need attention.
The key is getting them in the ground at the right time and letting nature handle the rest.
These seeds thrive in poor soil, need full sun, and only want water when the top inch feels dry. Scatter them lightly over prepared beds in early spring or fall, press them in just a quarter-inch deep, and forget about them until the first lace-like leaves appear.
They self-seed like crazy, so you’ll have blooms for years without replanting.
By midsummer, you’ll have clouds of tender blue and white flowers that hummingbirds and bees can’t resist. The seeds themselves are edible (they’re the same as love-in-a-mist), and the plants stay tidy without pruning. It’s the kind of garden that looks effortless because, honestly, it is.
Works in any sunny spot, from cottage gardens to city containers. Once established, these plants practically take care of themselves—just enjoy the show. Here’s how to get started without overcomplicating it.
📚 In This Guide
- What you need
- Instructions
- Tips and common mistakes
- Wrapping up and next steps
What you need
- ● Nigella seeds: 1–2 grams (about 50–100 seeds, depending on variety). Choose Nigella damascena (Love-in-a-Mist) for classic blooms or other varieties like Nigella sativa (for culinary use).
- ● Well-draining potting mix: 1–2 gallons (for indoor starts) or garden soil amended with compost (for direct sowing). Aim for a pH of 6.0–7.5.
- ○ Containers (optional for indoor starts): Biodegradable pots (3–4 inches deep) or seed trays with drainage holes.
- ● Peat pellets or small pots (if transplanting later).
- ● Garden space or large containers: Full sun (6+ hours/day) and 6–12 inches of spacing between plants (they self-seed, so leave room!).
- ● Watering can or spray bottle: With a fine rose nozzle to avoid disturbing seeds.
- ● Gardening gloves: To protect hands from soil and prickly seed pods.
- ● Seed-starting heating mat: Speeds up germination if starting indoors in cool climates.
- ● Grow lights: 12–16 hours/day for indoor seedlings (if natural light is limited).
- ● Mulch (straw or shredded leaves): Retains moisture and suppresses weeds.
- ● Compost or balanced fertilizer (5-10-5): Lightly mix into soil before planting for extra vigor.
- ● Plant labels: Mark varieties if growing multiple types.
Step-by-Step instructions for planting Nigella seeds
Here’s how to coax those delicate blue lacy flowers into your garden with almost no effort.
🌱 Step 1: Choose the Perfect Spot and Prepare the Soil
Nigella thrives in full sun—at least 6 hours daily—but tolerates light shade in hotter climates. I always pick a spot where it can spread naturally, like along a fence or near a path, where those whimsical seed pods can dangle and self-sow. The soil doesn’t need to be rich, but it must drain well—these plants rot if their roots sit in soggy soil.
Loosen the top 6 inches of soil with a fork, breaking up any clumps. Mix in a handful of compost or the 1 cup of slow-release fertilizer if your soil is particularly lean. Nigella’s happy in average garden soil, but a little organic matter ensures those first blooms appear faster. Rake the surface smooth so seeds won’t sink too deep when you plant.
🌱 Step 2: Sow Seeds Directly in the Garden
Nigella seeds are tiny, so I scatter them ¼ inch deep—just press them into the soil, don’t bury them. Space them 6-12 inches apart if you want neat rows, but I often let them self-seed naturally for a wild, cottage-garden look. A light dusting of soil over the top keeps them in place, but don’t pack it down.
Water gently right after sowing to settle the seeds, but don’t soak the soil—these seeds need air to germinate. I use a fine mist from a spray bottle to avoid displacing them. Once watered, leave them alone. Nigella seeds sprout best in 60-70°F soil, so if your spring is still chilly, wait until the ground warms before planting.
☀️ Step 3: Provide Minimal Care for Fast, Self-Sustaining Growth
Nigella seedlings will pop up in 2-4 weeks, looking like tiny, jagged leaves. Thin them to 6 inches apart once they’re 2 inches tall, snipping the weakest ones at the base with scissors. This ensures stronger plants and more blooms. I always leave a few extra just in case—these seeds are stubborn and often sprout where you least expect them.
Water only when the top 1 inch of soil feels dry. Overwatering is the biggest mistake—these plants hate wet feet. Once established, they’re drought-tolerant, so I rarely water them after the first month. Mulch around the base with 1 inch of straw to keep moisture in and weeds out, but don’t pile it against the stems.
✂️ Step 4: Enjoy Blooms and Let Seed Pods Form Naturally
Nigella blooms in 8-10 weeks after sowing, producing those signature lacy blue (or white, pink, or purple) flowers that hummingbirds and bees adore. Deadhead spent blooms if you want tidier plants, but I usually leave them—the seed pods are just as charming as the flowers and self-sow effortlessly for next year.
When the pods turn brown and dry, they’ll pop open to release new seeds, creating a never-ending cycle. I let them go wild in one corner of the garden, where they spread like confetti. If you want to collect seeds for next year, harvest the pods when they’re dry but before they split open.
Tips & tricks for perfect Nigella seeds planting
These simple tricks will help you grow a thriving pollinator haven with almost no effort—Nigella's one of those magical plants that rewards patience with stunning blooms.
Sunlight Strategy: While Nigella tolerates light shade, those 6 hours of full sun are crucial for robust blooms. I plant mine near my south-facing fence where they get morning sun and afternoon shade in summer—this balance prevents stress while still producing abundant flowers. If your garden gets intense afternoon sun, consider a spot with partial afternoon shade, especially in hotter climates.
Soil Preparation Secret: The 6 inches of loosened soil you prepare in Step 1 is your foundation for success. I like to add a thin layer of coarse sand to improve drainage if my soil tends to stay damp. This prevents the root rot that can kill nigella plants—trust me, I've learned this the hard way after losing a whole batch! The key is making sure water drains away quickly rather than pooling around the roots.
Timing Tip for Germination: Those 60-70°F soil temperatures are non-negotiable for good germination rates. If you're planting in early spring when soil is still cool, I recommend using a soil thermometer to check temperatures. You can also create a mini greenhouse effect by covering newly sown seeds with clear plastic until germination occurs—this helps warm the soil faster. Once sprouted, remove the plastic immediately to prevent fungal issues.
Thinning Technique: When you thin seedlings to 6 inches apart in Step 3, I suggest doing it gradually over a few days rather than all at once. This gives the remaining plants time to adjust to their new spacing. For the seedlings you remove, don't toss them! Plant them in a nearby pot or another garden spot—they'll often survive and continue growing.
Pro Tips for Nigella Seeds Planting
- These simple tricks will help you grow a thriving pollinator haven with almost no effort—Nigella's one of those magical plants that rewards patience with stunning blooms.
- Sunlight Strategy: While Nigella tolerates light shade, those 6 hours of full sun are crucial for robust blooms.
- Soil Preparation Secret: The 6 inches of loosened soil you prepare in Step 1 is your foundation for success.
Frequently asked questions
Got questions about growing nigella seeds? You’re not alone! Here are the answers to the most common queries—so you can cultivate these pollinator magnets with confidence.
When is the best time to plant nigella seeds?
Nigella seeds thrive in cool weather—plant them 2–4 weeks before your last frost date in spring or directly sow in late summer/early fall for a winter display. They’re frost-tolerant, so don’t rush! Avoid scorching summer heat, which can stunt germination.
How long does it take for nigella seeds to germinate?
Germination is slow but steady: expect sprouts in 2–4 weeks under ideal conditions (moist, well-drained soil at 60–70°F). Patience is key—keep soil consistently moist (not soggy) and avoid disturbing the area until seedlings emerge.
Can I grow nigella seeds in containers?
Nigella adapts well to containers 6+ inches deep with drainage holes. Use a lightweight potting mix, and place pots in full sun. Just ensure containers stay moist—drought stress can cause leggy stems. Perfect for balconies or small gardens!
Why aren’t my nigella seeds sprouting?
Try these fixes:
- Depth issue: Plant seeds ¼ inch deep—too deep delays germination.
- Soil temp: Seeds need warmth (60°F+); use a heat mat if spring soil is cold.
- Moisture: Keep soil damp (like a wrung-out sponge) but avoid waterlogging.
- Fresh seeds: Old seeds (over 2 years) may fail—opt for new packets.
Do nigella seeds self-seed aggressively?
Yes! Nigella is a volunteer plant—once established, it’ll pop up year after year. To control spread, deadhead spent blooms before seed pods form or thin seedlings. Embrace the wildflowers if you love surprises!
Wrapping up and next steps
Planting nigella seeds is a rewarding journey that brings beauty, fragrance, and life to your garden with minimal effort! 🌸 These delicate blooms not only attract pollinators but also thrive in almost any soil, making them perfect for beginners and seasoned gardeners alike.
Whether you’re adding them to borders, containers, or wildflower meadows, their effortless charm will leave your space buzzing with activity.
Now that you’re armed with all the tips and tricks, take the leap and sow those seeds—your garden (and the bees!) will thank you. Ready to watch your pollinator haven flourish? Grab your gloves, find a sunny spot, and let nature do the rest! 🌱✨