How To
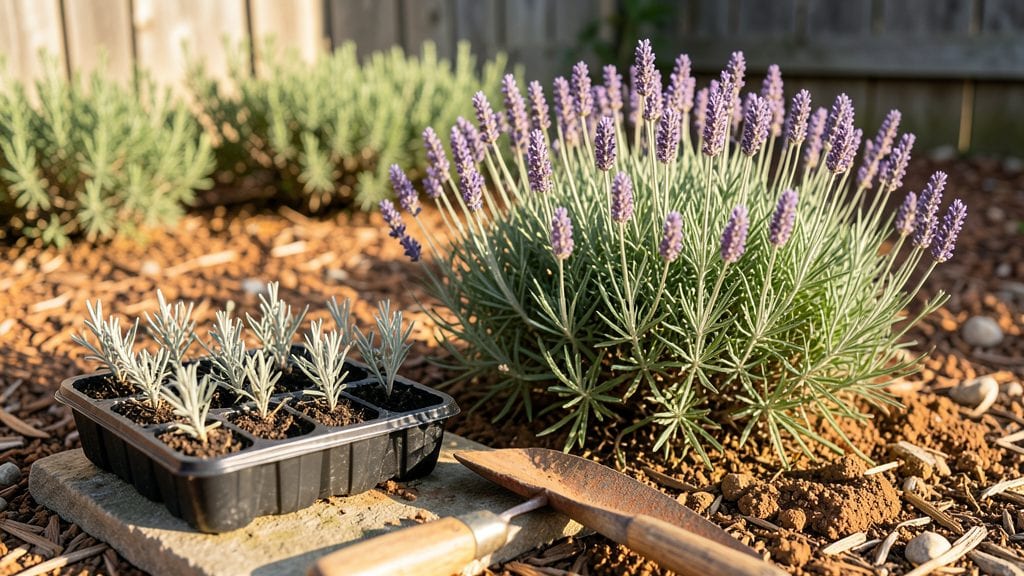
Martha Stewart's planting method transforms even a small patch into a showstopping garden. 🌸 I’ve used her three-expert-trim approach for years—it’s the secret behind gardens that bloom from spring through frost.
The key isn’t just what you plant, but how you plant it: soil prep, spacing, and timing that make all the difference.
Her technique starts with loose, nutrient-rich soil—think crumbly, not compact—and she swears by companion planting to keep pests away naturally. Containers work just as well as in-ground beds, so whether you’ve got a balcony or a backyard, you can create that Martha Stewart signature look.
The real magic happens in the three strategic trims she teaches: one for early spring, one for mid-season, and one for late fall.
By following her method, you’ll end up with longer blooms, fuller foliage, and plants that look like they belong in a magazine spread. The first trim alone can double your flowers—no kidding.
Plus, her tips on deadheading and mulching keep your garden looking polished with minimal effort. Ready to try it?
This works for perennials, annuals, and even herbs—no fancy tools required. Just a trowel, some patience, and Martha’s no-nonsense advice. Let’s get those roots in the ground the right way!
📚 In This Guide
- What you need
- Instructions
- Tips and common mistakes
- Wrapping up and next steps
What you need
- ● Seeds or young plants: Choose annuals (e.g., petunias, marigolds, zinnias) or perennials (e.g., lavender, coneflowers, black-eyed Susans) based on your climate and bloom goals. Pro tip: Start with 10–20 plants for a balanced look!
- ● Potting soil: 5–10 bags (1–2 cubic feet each) of high-quality, well-draining miracle-gro potting mix or garden soil amended with compost.
- ● Fertilizer: Slow-release granules: 1–2 lbs (e.g., Osmocote Smart-Release Flower & Vegetable)
- ● Liquid feed: 1 gallon of Miracle-Gro All-Purpose Plant Food (for mid-season boosts)
- ● Mulch: 2–3 bags of shredded bark or pine straw to retain moisture and suppress weeds.
- ● Hand trowel: 1 (for precision planting)
- ● Garden gloves: 1 pair (nitrile-coated for grip)
- ● Watering can or hose: With a gentle spray nozzle (avoid blasting roots!)
- ● Pruning shears: Felco F-2 or similar (sharp and ergonomic)
- ● Measuring tape: 1 (for spacing plants 12–24" apart)
- ○ Optional (but Martha-approved!): Knee pad (for comfort)
- ● Garden cart (for hauling soil/mulch)
- ● Decorative pots (if container gardening)
- ● Sunlight assessment: Know your garden’s sunlight exposure (full sun = 6+ hours/day; partial shade = 3–6 hours).
- ● Weather check: Plant in spring after the last frost (or fall for cool-season blooms).
- ● Space planning: Sketch a layout or use Martha’s trick: Group plants by height (tallest in back, shortest in front).
- ● Water source nearby: Gardens need 1–1.5 inches of water weekly (more in heatwaves!).
Step-by-Step instructions for Martha Stewart planting guide
Here's the method that guarantees vibrant, long-lasting blooms with minimal effort.
🌱 Step 1: Choose the Right Plants for Year-Round Color
Martha Stewart's signature approach relies on a strategic mix of seasonal bloomers. Start with perennials like coneflowers, black-eyed Susans, and daylilies for summer-to-fall color, then layer in evergreen shrubs (like boxwood or holly) for winter structure. For spring, incorporate bulbs such as daffodils and tulips, which multiply over time.
I always select plants with staggered bloom times—this ensures your garden never looks bare. For example, pair early bloomers like crocuses with mid-season peonies and late-season asters. Check each plant's mature height and spread to avoid overcrowding; most perennials need 18-24 inches of space to thrive.
🪴 Step 2: Prepare the Soil for Optimal Growth
Healthy soil is the foundation of Martha Stewart's lush gardens. Begin by testing your soil's pH—most flowering plants prefer a slightly acidic to neutral range (6.0-7.0). Amend the soil with 2-3 inches of compost and a balanced, slow-release fertilizer (like 10-10-10) before planting. Work it into the top 6-8 inches of soil to create a loose, crumbly texture.
For heavy clay soil, mix in sand or perlite to improve drainage. If your soil is sandy, add peat moss or coconut coir to retain moisture. The goal is a well-aerated, nutrient-rich medium that encourages strong root development. I like to add a handful of mycorrhizal fungi to the planting hole—it boosts root health and drought resistance.
☀️ Step 3: Plant with Precision for Long-Term Beauty
Dig holes twice as wide as the plant's root ball but only as deep as the container's base. Gently remove the plant from its pot and tease the roots outward if they're circling. Place the plant in the hole so the top of the root ball sits 1 inch below soil level—this prevents stem rot and encourages strong growth.
Backfill with native soil mixed with compost, tamping lightly to eliminate air pockets. Water deeply to settle the soil and eliminate gaps. I always mulch around the base with 2-3 inches of organic mulch (like shredded bark or pine needles) to retain moisture and suppress weeds. Keep mulch 2 inches away from the stem to prevent rot.
✂️ Step 4: Implement the 3 Expert Trims for Year-Round Blooms
The key to Martha Stewart's signature look is strategic pruning. First, do a spring cleanup in early March—remove dead or damaged stems and cut back last year's growth by one-third. This encourages fresh, vigorous growth. Next, perform a mid-season trim after the first flush of blooms to promote a second round of flowers.
Finally, do a late-season reset in fall. Cut back perennials to 4-6 inches above the ground, leaving evergreens and woody shrubs untouched. This keeps the garden tidy and protects plants from winter damage. Always use clean, sharp pruners to make cuts at a 45-degree angle just above a leaf node.
💧 Step 5: Maintain with Minimal Effort for Maximum Impact
Water deeply 1-2 times per week (more in extreme heat) to encourage deep root growth. I use a soaker hose or drip irrigation to deliver moisture slowly at the base of plants. Avoid overhead watering, which can spread disease and waste water through evaporation.
Fertilize lightly every 6-8 weeks during the growing season with a balanced, organic fertilizer. Deadhead spent blooms regularly to redirect energy into new growth. I also monitor for pests—if you spot aphids or powdery mildew, treat immediately with neem oil or insecticidal soap to keep plants thriving.
Tips & tricks for perfect year-round blooms
Creating a garden that thrives through every season requires more than just planting—it's about strategic choices that build on Martha Stewart's signature approach. Here are the essential tips to elevate your planting game and ensure vibrant blooms from spring to fall.
Seasonal Layering Strategy: In Step 1, when selecting plants, think vertically as well as horizontally. Taller perennials like coneflowers should anchor the back of your borders, while shorter varieties like daylilies can spill forward. For winter interest, incorporate evergreens like boxwood that provide structure when other plants are dormant. This layered approach creates visual depth and ensures your garden remains dynamic throughout the year.
Soil Preparation Pro Tip: The 2-3 inches of compost and 6-8 inches of soil amendment in Step 2 aren't just numbers—they're about creating the perfect environment. For heavy clay soils, mix in perlite at a ratio of 1 part perlite to 3 parts soil by volume. In sandy soils, coconut coir retains moisture better than peat moss (which is increasingly controversial). The mycorrhizal fungi addition is optional but game-changing—it forms a symbiotic relationship with plant roots, helping them absorb nutrients more efficiently.
Planting Precision: The 1-inch depth recommendation in Step 3 is critical for preventing stem rot while encouraging strong root development. When teasing roots outward, be gentle—you're not trying to force them apart, just loosening any circling roots that might restrict growth. For container plants, soak the root ball in water for 10-15 minutes before planting to reduce transplant shock. This simple step can dramatically improve survival rates, especially in hot or dry conditions.
Pruning Technique: The 45-degree angle cut mentioned in Step 4 isn't just aesthetic—it promotes better water runoff and prevents water from pooling at the cut site, which can lead to rot. For the spring cleanup, if you're unsure which stems are dead, make a small scratch on the stem with your pruners. If it's green underneath, it's alive; if it's brown, it's dead and should be removed. This simple test prevents unnecessary pruning of healthy growth.
Pro Tips for Martha Stewart Planting
- Creating a garden that thrives through every season requires more than just planting—it's about strategic choices that build on Martha Stewart's signature approach.
- Seasonal Layering Strategy: In Step 1, when selecting plants, think vertically as well as horizontally.
- Soil Preparation Pro Tip: The 2-3 inches of compost and 6-8 inches of soil amendment in Step 2 aren't just numbers—they're about creating the perfect environment.
Frequently asked questions
Got questions about Martha Stewart’s legendary planting techniques? You’re not alone! Whether you're a beginner or a seasoned gardener, these answers will help you grow like a pro.
What’s the best time of year to plant for year-round blooms?
Martha Stewart recommends spring and early fall as the ideal planting windows for most perennials and annuals. Spring ensures roots establish before summer heat, while fall allows plants to grow without competing with summer’s intensity. For tropical plants or heat-lovers, late spring is key! Pro tip: Check your USDA hardiness zone for local timing tweaks.
How often should I trim my plants for continuous blooms?
Martha’s method? Trim every 4–6 weeks during active growth (spring to fall). Deadhead faded blooms immediately to encourage new flowers, and prune leggy stems by ⅓ to promote bushier growth. For perennials like lavender or roses, a light annual prune in late winter keeps them tidy. Warning: Avoid heavy trims in fall—plants need energy to store for winter!
Can I use Martha’s techniques with container gardening?
Containers thrive with the same principles: well-draining soil, proper spacing, and regular trimming. Opt for compact varieties (like dwarf petunias or thyme) and fertilize every 2–3 weeks. Just ensure pots have drainage holes—Martha swears by terracotta for heat-lovers and fabric pots for moisture control. Rotate containers monthly for even sun exposure!
What do I do if my plants look stressed after planting?
Wilting or yellowing? Start with watering deeply (1–2 inches per week) but avoid soggy soil. Check for pests (aphids, spider mites) and treat with neem oil if needed. If leaves curl, it might be heat stress—provide afternoon shade until plants acclimate. Over-fertilizing can burn roots, so wait 4–6 weeks post-planting before feeding.
Are there low-maintenance alternatives to Martha’s pruning method?
Yes! For hands-off blooms, try self-cleaning plants like black-eyed Susans or Russian sage—they shed spent blooms naturally. Succulents and ornamental grasses also need minimal trims (just snip dead fronds in spring). Mulch heavily (3–4 inches) to retain moisture and suppress weeds, cutting chores by 50%.
Wrapping up and next steps
Martha Stewart’s approach to planting and pruning proves that beauty and simplicity go hand in hand—whether you’re a seasoned gardener or just starting out! With the right tools, techniques, and a dash of patience, you can enjoy year-round blooms that bring joy to your outdoor space.
The key takeaway? Confidence grows with practice, and every trim brings you closer to a thriving garden.
Ready to put your new skills to the test? Start small—pick one plant or section of your garden to focus on this season. Before you know it, you’ll be channeling Martha’s green thumb like a pro! 🌿✨