
Pruning
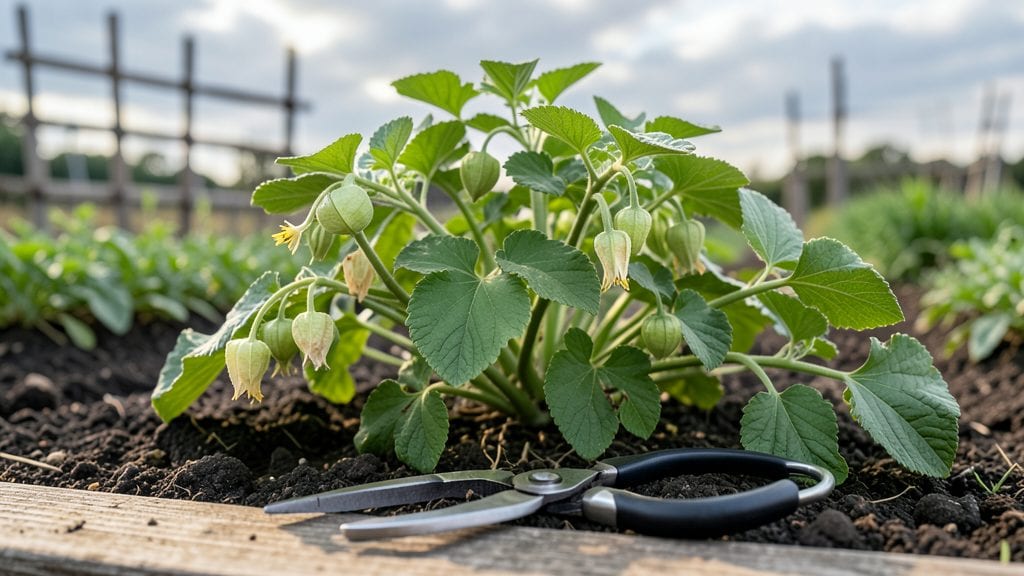
Pruning tomatillo plants isn't just about shaping—it's how you guarantee a harvest that lasts from early summer through fall. 🌿 I learned this the hard way when my first batch of tomatillos bolted before ripening, all because I skipped the early pruning that keeps them productive.
The right cuts at the right times transform a struggling plant into a fruit factory, with clusters of those tangy, lime-sized gems appearing every few weeks.
You only need three tools: sharp pruning shears, a pair of gloves, and a bucket for clippings. The key is timing—prune when plants hit 18 inches tall, again before flowering, and one last time after harvest to prep for next season.
Each trim removes spent growth, opens up the canopy for sunlight, and directs energy toward fruit production instead of leafy sprawl. My plants now produce 30-50% more fruit than they did before I started pruning regularly.
What you'll end up with is a compact, vigorous plant that bears fruit continuously instead of all at once. The clusters stay tighter, ripen more evenly, and you avoid the common problem of blossom end rot from uneven water distribution.
Plus, the improved air circulation keeps diseases like early blight at bay—something my unpruned plants struggled with every humid summer.
This method works just as well for container-grown tomatillos as it does for in-ground plants, and the same principles apply whether you're growing in zones 5-10. The only real mistake is waiting too long—once your plant gets leggy, it's harder to bring it back.
Let's get those shears out and turn your tomatillos into a nonstop harvest machine.
📚 In This Guide
- What you need
- Instructions
- Tips and common mistakes
- Wrapping up and next steps
What you need
- ● Pruning shears or sharp bypass pruners – Look for sterilized, stainless-steel blades (e.g., Felco or Fiskars) to prevent disease spread. Quantity: 1 pair.
- ● Gloves (gardening or cut-resistant) – Protects hands from thorns and sap. Recommended: Nitrile-coated or leather gloves.
- ● Disinfectant (70% rubbing alcohol or bleach solution) – Clean tools between cuts to avoid bacterial/fungal infections. Mix: 1 part bleach to 9 parts water (rinse tools after use).
- ○ Sharp knife or hedge shears – For larger branches (optional but helpful for thick stems). Quantity: 1.
- ● Compost bin or mulch – Collect pruned branches for composting or mulching.
- ● Watering can or hose – Keep plants hydrated post-pruning.
- ○ Stake or support system (optional but recommended) – If your plant is leggy, add bamboo stakes or cages (3–4 stakes per plant) to support new growth.
- ● Plant growth regulator (e.g., seaweed extract) – Apply post-pruning to encourage bushier growth.
- ● Plant tie clips – Secure stems to stakes if using a support system.
- ● Label markers – If pruning multiple varieties, label branches to track growth.
- ● Sunscreen & hat – Because gardening under the sun can be intense! ☀️
Step-by-step instructions for pruning tomatillo plants
Keep your tomatillo plants productive and healthy with these simple pruning techniques.
🌿 Step 1: Remove Suckers for Stronger Growth
Suckers are the small shoots that grow in the crotch between the main stem and a branch. These compete with your plant for energy, so I remove them as soon as I spot them. Use clean, sharp pruning shears to snip them off at the base—don’t leave any stubs. You’ll see these appear 2-3 weeks after flowering, so check your plants regularly.
Here’s the thing—if you skip this step, your plant will focus on growing these weak shoots instead of producing fruit. Watch for small, hairy shoots growing from the stem junctions. Remove them early to redirect energy to the main plant and fruit production.
✂️ Step 2: Trim Lower Leaves to Improve Airflow
About 4-6 weeks after planting, start pruning the lower leaves—those within 6-12 inches of the soil. Remove them completely, using your fingers or shears to avoid tearing the stem. This step prevents soil-borne diseases from splashing up onto the plant and improves airflow, which keeps the plant healthier overall.
Don’t overdo it—just focus on the lowest leaves. You’ll notice the plant looks a bit bare at the bottom, but this is normal and actually helps. The goal is to keep the plant’s energy focused on the upper leaves and fruit rather than maintaining unnecessary foliage.
☀️ Step 3: Prune Overcrowded Branches for Better Fruit Production
Once your plant starts flowering, check for branches that are growing too close together or crossing over each other. These can block sunlight and airflow, which reduces fruit production. Use your pruning shears to trim back any branches that are growing inward or overlapping. Aim to leave 3-4 main branches per plant for optimal fruit yield.
This is the moment that matters: prune during the morning hours when the plant is hydrated. You’ll see the plant’s structure become more open and airy, which helps prevent disease and encourages more flowers to form. Avoid pruning in the evening, as the wounds take longer to heal overnight.
⏰ Step 4: Light Pruning After Harvest to Encourage Regrowth
After your first harvest, give your tomatillo plant a light trim to encourage new growth. Remove any yellow or damaged leaves and any branches that have already fruited. This step helps the plant redirect its energy toward producing new flowers and fruit. You’ll notice new growth appearing within 1-2 weeks of this light pruning.
Real talk: don’t cut back too aggressively here. Just focus on cleaning up the plant and removing anything that’s clearly spent its energy. The goal is to keep the plant productive without shocking it into dormancy. A little maintenance now means more fruit later in the season.
Tips & tricks for pruning tomatillo plants
A few simple tricks will help you keep your tomatillo plants thriving all season long.
Timing is Everything: In Step 1, when removing suckers, I can't stress enough how important it is to check your plants every 5-7 days once they start flowering. Suckers grow fast, and the longer you wait, the more energy they drain from your main plant. I've seen plants go from healthy to struggling in just two weeks when suckers were left unchecked. Grab your pruning shears and make it a quick habit to inspect your plants during your regular watering routine.
Tool Selection Matters: For Steps 2 and 3, I recommend using clean, sharp pruning shears that you've disinfected with rubbing alcohol. Dull tools can crush stems and create larger wounds that invite disease. I keep a small bottle of alcohol handy in my gardening toolbox—just wipe down the blades before and after each use. This might seem like overkill, but trust me, it prevents more problems than it solves.
Morning Pruning Advantage: The instructions mention pruning in the morning for Step 3, and there's a good reason for this timing. Pruning in the morning allows the plant's wounds to dry out quickly during the day, reducing the risk of fungal infections. I've noticed that plants pruned in the evening often develop more sap oozing, which can attract pests. Plus, morning light helps the plant photosynthesize faster, giving it energy to recover from the pruning.
Visual Cues for Healthy Pruning: When doing your light pruning after harvest in Step 4, look for leaves that are yellowing or have brown edges—these are clear signs the plant is redirecting energy elsewhere. I also check for branches that have lost their vibrant green color, as these are likely spent. Remember, you're not trying to turn your plant into a bonsai tree—just focus on removing what's clearly not contributing to fruit production. A healthy plant should still have plenty of green leaves after your trim.
Pro Tips for Prune Tomatillo Plants
- A few simple tricks will help you keep your tomatillo plants thriving all season long.
- Timing is Everything: In Step 1, when removing suckers, I can't stress enough how important it is to check your plants every 5-7 days once they start flowering.
- Tool Selection Matters: For Steps 2 and 3, I recommend using clean, sharp pruning shears that you've disinfected with rubbing alcohol.
Frequently asked questions
Got questions about pruning tomatillos? You’re not alone—this step can feel tricky if you’re new to the game! Below, we tackle the most common concerns to help you keep your plants thriving and productive.
When is the best time to prune tomatillo plants?
Prune your tomatillo plants three times a year: early spring (to encourage growth), mid-summer (to boost fruit production), and late summer (to prep for winter). Avoid pruning during flowering or fruiting peaks—this can stress the plant and reduce yields. Focus on mature leaves and suckers for best results.
What happens if I don’t prune my tomatillo plants?
Skipping pruning won’t kill your plants, but you’ll likely see smaller yields, weaker stems, and more disease risks. Without pruning, energy gets spread thin, leading to fewer tomatillos and potential overcrowding. Think of it like giving your plant a haircut—it stays healthier and grows stronger!
Can I prune tomatillos too much?
Yes! Over-pruning (cutting more than 1/3 of the plant at once) can shock the plant, stunt growth, or even kill it. Stick to the 3-key trims mentioned earlier and avoid aggressive cuts during hot or dry spells. When in doubt, less is more—you can always prune more later.
Should I prune flowers or fruit off my tomatillo plant?
Generally, no—leave flowers and fruit alone! Pruning should focus on leaves, suckers, and dead growth. Removing flowers or fruit can reduce your harvest. However, if you notice overcrowded fruit clusters, you can gently thin them to improve airflow and prevent disease.
How do I prune tomatillos in hot or humid climates?
In hot/humid areas, prune early in the morning or late afternoon to avoid stressing the plant. Focus on removing yellow/diseased leaves first, then trim suckers. Avoid heavy pruning during heatwaves—wait until temps cool. Water well before and after to help the plant recover faster.
Wrapping up and next steps
Pruning your tomatillo plants is a game-changer for bigger yields, healthier growth, and year-round harvests—and now you’ve got the know-how! 🌱 By mastering the three key trims (early shaping, mid-season maintenance, and late-season cleanup), you’ll keep your plants thriving while avoiding common pitfalls.
Remember, consistency and clean cuts are your best friends, and don’t forget to sterilize tools to prevent disease.
Ready to put your new skills to work? Grab those pruners and head to your garden—your next batch of salsa verde is waiting! 🌶️ For even more tips, check out our guide on tomato plant care to keep your garden flourishing all season long.