
Propagation
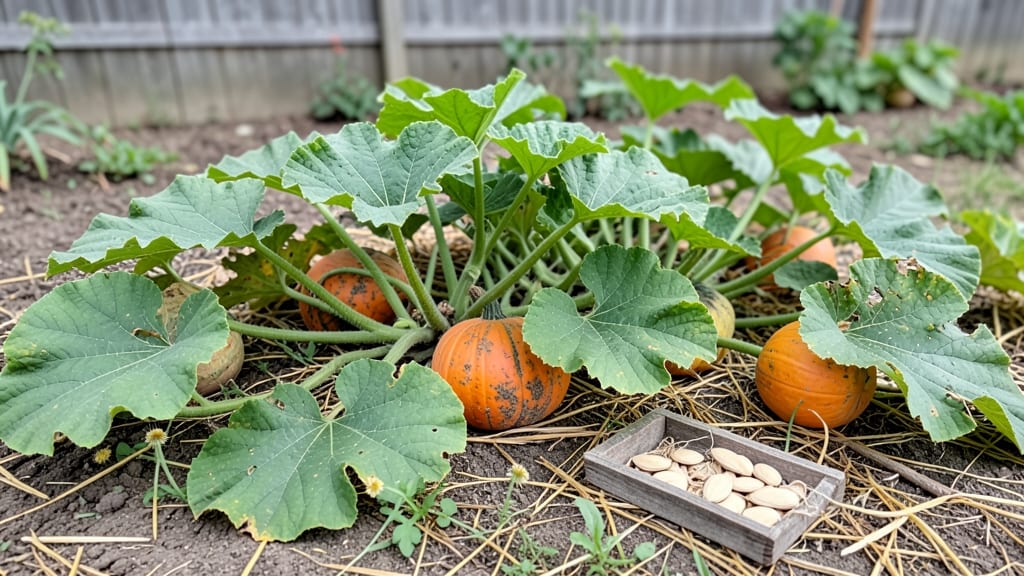
Cleaning pumpkin seeds for planting starts with a simple kitchen trick that saves you from buying expensive starter plants. 🌱 I’ve saved hundreds of dollars over the years by rescuing seeds from store-bought pumpkins—no special tools required, just a bowl, some water, and a little patience.
The process takes less than 30 minutes, and you’ll end up with seeds that sprout faster than anything from a garden center.
Most people skip the soaking step, but I’ve found it cuts down on moldy seeds and speeds up germination. After scooping the seeds from the pumpkin’s cavity, rinse them in cool water to remove the stringy pulp, then let them dry on a paper towel for 24 hours.
This drying step is critical—wet seeds rot in storage, and nobody wants to waste their effort on a bad batch.
Once dry, you’ll have plump, clean seeds ready to plant or store. The best part? These seeds produce vibrant, disease-resistant vines that thrive in containers or garden beds. By next summer, you’ll be harvesting your own pumpkins—or saving seeds again for another round of this foolproof process.
Whether you’re growing for fun or planning a fall harvest, this method works for any pumpkin variety. Store the seeds in a cool, dark place until spring, and you’ll be ready to plant when the soil warms to 60°F. No fancy equipment, just reliable results every time.
📚 In This Guide
- What you need
- Instructions
- Tips and common mistakes
- Wrapping up and next steps
What you need
- ● Fresh pumpkin seeds: Harvest seeds from a ripe, organic pumpkin (avoid store-bought if possible—pesticides can hinder germination). Aim for 1–2 cups (about 100–200 seeds, depending on pumpkin size).
- ● Water: 1–2 gallons (for soaking and rinsing). Use room-temperature or lukewarm water.
- ● Colander or fine-mesh strainer: A stainless steel or plastic strainer with small holes (≤ 1/8 inch) to trap seeds while rinsing.
- ● Paper towels or clean kitchen towels: 2–3 sheets (for drying seeds). Use unbleached, lint-free towels if possible.
- ● Knife or spoon: A small, sharp chef’s knife or spoon for scraping seeds from pumpkin flesh.
- ● Baking sheet or tray: A flat, non-stick surface (preferably with edges) to lay seeds out for drying.
- ○ Container for storage (optional but helpful): A small airtight jar or resealable bag (e.g., 1-quart mason jar) for seed storage.
- ● Food dehydrator: Speeds up drying time if you’re impatient! Set to 135°F (57°C) for 2–4 hours.
- ● Seed cleaning tray: A mesh-lined tray (available at garden stores) for bulk seed drying.
- ● Hydrogen peroxide (3%): 1 tbsp per 1 cup of water for a sanitizing soak (kills mold/bacteria).
- ● Label and marker: To mark seed variety and date harvested on your storage container.
- ● Gloves: Nitrile or latex to protect hands from pumpkin residue.
Step-by-step instructions for cleaning pumpkin seeds for planting
Here's how to prep seeds for planting—no special tools, just patience and a few basic supplies.
🪴 Step 1: Extract and Rinse Seeds from the Pumpkin
Cut open a fully ripened pumpkin (the skin should be hard and the stem dry) and scoop out the stringy pulp with seeds. Place the pulp and seeds in a bowl filled with 2-3 inches of water. The seeds will sink to the bottom while the pulp floats—this makes separation easy. Swirl the water gently, then scoop out the floating pulp with a spoon.
Transfer the seeds to a colander and rinse them under cool running water for 30 seconds to remove any lingering pulp residue. You'll see the seeds go from slimy to clean as you rinse. Pat them dry with a clean towel or paper towels, pressing gently to remove excess moisture. Wet seeds won’t store well and may develop mold.
💧 Step 2: Soak and Dry for Viability
Fill a jar or container with 1 inch of water at room temperature. Add the rinsed seeds and let them soak for 24-48 hours. Healthy seeds will float—these are the ones you’ll plant. Discard any seeds that sink to the bottom, as they’re likely non-viable or damaged. After soaking, drain the water and spread the seeds on a clean, dry towel or paper towels.
Place the seeds in a warm, dry spot with good airflow (like a sunny windowsill or a fan-assisted drying rack). Let them dry completely for 2-3 days, stirring them occasionally. You’ll know they’re ready when they feel dry to the touch and the outer shell looks slightly shriveled. Store them in a paper envelope in a cool, dark place until planting.
☀️ Step 3: Test and Store for Planting
To ensure viability, place a few seeds between damp paper towels in a sealed plastic bag. Keep them in a warm spot (70-75°F) and check daily. Within 3-5 days, you should see sprouts emerging from the seeds—this confirms they’re ready for planting. If no sprouts appear after a week, those seeds may not be viable.
For long-term storage, keep the dried seeds in a paper envelope or breathable container in a cool, dry place. Pumpkin seeds can last 2-3 years if stored properly, though germination rates may decline over time. When planting, sow them 1 inch deep in well-draining soil after the last frost date, spacing them 6 inches apart for healthy growth.
Tips & tricks for perfect pumpkin seed cleaning
These simple tricks will help you get the most viable seeds from your pumpkin with minimal effort.
The Water Depth Trick: When separating seeds from pulp in Step 1, use exactly 2-3 inches of water—not too shallow or deep. Too little water won't fully submerge the pulp, while too much makes scooping difficult. The seeds will naturally sink while pulp floats, making separation effortless once you get the water level right.
Rinsing Technique: That 30-second rinse under cool running water is crucial for removing slimy residue. Use your fingers to gently rub the seeds while rinsing—they'll go from sticky to clean in seconds. Don't skip this step or your seeds may develop mold during storage.
Soak Time Matters: The 24-48 hour soak in Step 2 is where viability testing begins. Healthy seeds float because they absorb water and become buoyant—these are your keepers. Discard any that sink immediately, as they're likely non-viable. After soaking, spread seeds on a towel in a single layer to dry evenly.
Drying Strategy: For the 2-3 day drying period, place seeds in a warm spot with airflow like a sunny windowsill or near a fan. Stir them every few hours to prevent clumping. When they feel dry to the touch and look slightly shriveled, they're ready for storage. Proper drying prevents mold and extends shelf life.
Pro Tips for Clean Pumpkin Seeds For Planting
- These simple tricks will help you get the most viable seeds from your pumpkin with minimal effort.
- The Water Depth Trick: When separating seeds from pulp in Step 1, use exactly 2-3 inches of water—not too shallow or deep.
- Rinsing Technique: That 30-second rinse under cool running water is crucial for removing slimy residue.
Frequently asked questions
Got questions about cleaning pumpkin seeds for planting? Here are some common ones—and their answers—to help you grow strong, healthy pumpkins!
Can I use pumpkin seeds from store-bought pumpkins for planting?
Yes, but with a few caveats! Store-bought pumpkins are often treated to prevent sprouting. Check the label—if it says "treated" or "hybrid," the seeds may not grow. Organic, untreated seeds are your best bet for successful germination. If unsure, try a small batch first!
How long do cleaned pumpkin seeds last before planting?
Cleaned pumpkin seeds stay viable for 2–4 weeks if stored in a cool, dry place (like a paper envelope or breathable container). For longer storage, dry them further (until brittle) and keep them in an airtight container in the fridge—this can extend viability to 6 months or more.
What if my seeds don’t sprout after cleaning and planting?
Don’t worry—it’s not always the cleaning process! Try these fixes:
- Check moisture: Overwatering can drown seeds, while too little can dry them out. Keep soil evenly moist (not soggy).
- Warmth matters: Pumpkin seeds germinate best in 70–90°F (21–32°C) soil. Use a heat mat if your climate is cool.
- Freshness test: If seeds are old (over a year), germination rates drop. Try new seeds or soak them in water + a drop of hydrogen peroxide for 24 hours to boost energy.
Can I reuse leftover pumpkin seed pulp for anything?
The leftover pulp from cleaning seeds is nutrient-rich and compostable. Here’s how to repurpose it:
- Compost: Toss it into your compost bin—it breaks down quickly and adds organic matter.
- Seedling fertilizer: Blend it into a "seed starter tea" by steeping in water for 24 hours, then dilute and use on seedlings.
- Animal feed (safely): If you have chickens or goats, they’ll love the pulp as a treat (just ensure no mold or rot).
Are there any pumpkin varieties that don’t require seed cleaning for planting?
Most pumpkin varieties need cleaned seeds for planting, but some heirloom or open-pollinated types (like Cinderella or Jack Be Little) are more forgiving if you plant them whole—just scrape off excess flesh and let nature handle the rest. However, cleaning still improves germination rates and reduces pests.
Wrapping up and next steps
Cleaning pumpkin seeds for planting is simpler than you think—and the rewards are worth every minute! 🌱 With just a few steps, you’ll transform scraps into thriving plants, ready to grow into your own pumpkins or gourds.
Now that you’ve mastered the process, why not take the next step?
🌱 Ready to Grow?
Start by planting your cleaned seeds in soil (or a cozy paper towel for sprouting) and watch life unfold before your eyes. Share your progress with fellow gardeners or tag us—we’d love to see your green thumbs in action! Happy planting! 🎉