Landscaping
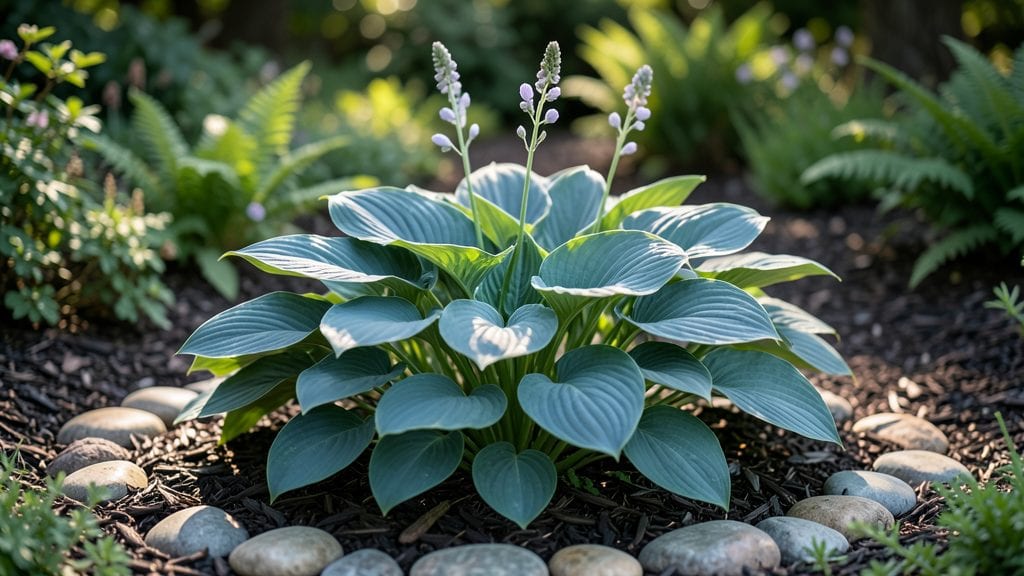
Hosta landscaping transforms shady spots into lush, low-maintenance retreats. 🌿 I’ve designed shade gardens where hostas anchor the space—bold foliage that thrives where sun-loving plants fail. The secret lies in layering textures, heights, and seasonal blooms around them, creating depth that lasts year-round.
Start with hostas as your foundation: choose varieties for size, color, and growth habits—some stay compact for borders, while others sprawl as dramatic focal points. Pair them with ferns, astilbes, and heucheras for contrast, and add spring bulbs like snowdrops or alliums for early color.
Even in winter, hostas’ sturdy leaves and occasional frost-kissed blooms keep the garden alive.
You’ll end up with a garden that feels alive in every season—spring’s fresh foliage, summer’s velvety textures, and autumn’s golden hues. The best part? Hostas handle neglect, deer often avoid them, and their layered companions reduce weeds naturally.
Think of it as a living tapestry that grows more beautiful with time.
Works for small yards, woodland edges, or even container gardens on patios. The key is balancing hostas with plants that complement their shade tolerance and moisture needs. Let’s bring that vision to life—one layer at a time.
📚 In This Guide
- What you need
- Instructions
- Tips and common mistakes
- Wrapping up and next steps
What you need
- ● Hosta plants – Choose 3–5 varieties (e.g., Hosta 'Blue Angel', 'Francee', 'Guacamole') for texture/color contrast. Quantity depends on garden size (aim for 1 plant per 1–2 sq ft for mature foliage).
- ● High-quality garden soil – 2–3 cubic yards (or amend existing soil with 2–3 inches of compost or peat moss for drainage).
- ● Organic mulch – 2–3 inches of shredded bark or pine needles to retain moisture and suppress weeds.
- ● Slow-release fertilizer – Balanced (e.g., 10-10-10) or organic options like fish emulsion (apply at planting and mid-season).
- ● Garden gloves – Heavy-duty (e.g., nitrile-coated) to protect hands from rough foliage.
- ● Hand trowel or transplant spade – For digging holes (1.5x wider and deep as the root ball).
- ○ Watering can or hose with nozzle – Drip irrigation (optional but ideal for consistent moisture).
- ● Pruners – Bypass pruners for clean cuts (sterilize with rubbing alcohol between plants).
- ● Edging materials – Brass, stone, or plastic edging to define plant beds and deter slugs.
- ● Slug/snail bait (iron phosphate-based) – Non-toxic option like Captain Jack’s (apply in early evening).
- ● Fungicide (copper-based) – For preventative care against powdery mildew (spray in humid climates).
- ● Garden stakes or labels – Mark varieties with waterproof tags or popsicle sticks.
- ● Shade cloth (30–50%) – Temporary cover for newly planted hostas in intense afternoon sun.
- ● Decorative rocks or stepping stones – For pathways or visual contrast in mixed beds.
Step-by-Step instructions for hosta plant landscaping
Turn your shady spots into lush, layered gardens with hostas—here’s how to plant them for year-round texture and impact.
🌱 Step 1: Select and Prepare Planting Sites
Hostas thrive in partial to full shade, so choose locations receiving 3-6 hours of filtered light daily. Avoid soggy soil—hostas rot in waterlogged conditions. I dig a hole twice as wide as the root ball but only as deep as the container’s base, ensuring the crown sits just below soil level (never buried). This prevents rot while encouraging sturdy growth.
For layered planting, position larger varieties at the back and smaller ones toward the front. I always sketch a rough layout first—hostas spread over time, so leave 18-24 inches between plants for mature size. Amend the hole with 2-3 inches of compost mixed into the native soil to improve drainage and fertility.
🪴 Step 2: Plant Hostas for Long-Term Health
Remove the hosta from its container and loosen the roots gently if they’re circling. Place the plant in the hole, backfilling with soil while pressing lightly to eliminate air pockets. Water deeply to settle the roots, then add a 1-inch layer of mulch (like shredded bark) around the base—keep mulch 2 inches away from the crown to prevent moisture buildup.
I like to water again after 24 hours to encourage root establishment. Hostas hate transplant shock, so I avoid planting during extreme heat or frost. The first true leaves should appear within 3-4 weeks—if they don’t, check for overwatering (yellow leaves) or underwatering (crispy edges).
☀️ Step 3: Layer with Complementary Shade Plants
Hostas shine in textural contrast, so I pair them with ferns, astilbes, and heucheras for height variation. For ground cover, add sweet woodruff or ajuga between hosta clumps to suppress weeds naturally. I plant these 6-12 inches away from hostas to avoid root competition early on.
Use evergreen shrubs like boxwood or inkberry holly as backdrop anchors. These provide winter structure while hostas go dormant. I always group hostas by color—blue hostas near silver foliage, golden varieties next to deep purple leaves—to create visual harmony. Water the entire bed deeply after planting to integrate all layers.
✂️ Step 4: Maintain for Season-Long Beauty
Deadhead spent flower stalks in early summer to redirect energy into foliage growth. I also divide mature hostas every 3-4 years in early spring or fall—dig up clumps, separate crowns with 3-5 leaves each, and replant immediately. This rejuvenates growth and prevents overcrowding.
Fertilize lightly in early spring with a balanced 10-10-10 formula (follow package rates). Hostas hate rich soil—too much nitrogen leads to weak stems. Instead, I focus on organic matter like composted leaves or worm castings. Watch for slugs in humid climates—apply iron phosphate bait preventatively in late spring.
⏰ Step 5: Winterize for Next Season
Leave dormant foliage intact until late winter—it protects crowns from freeze-thaw cycles. I only cut back brown, mushy leaves in early spring. For tender varieties, add a 2-inch layer of straw mulch in cold zones (below Zone 5). This insulates roots without suffocating them.
Take notes each year on which hostas thrive in your microclimate. I mark fast-spreading varieties with stakes so I don’t accidentally crowd them. By year three, your shade garden will have year-round interest—hostas in summer, evergreens in winter, and blooms in between.
Tips & tricks for perfect hosta plant landscaping
Creating a thriving hosta garden takes more than just planting—it's about strategic placement and ongoing care that transforms shade spaces into lush, dynamic displays.
Site Selection Secrets: That 3-6 hours of filtered light is crucial—morning sun with afternoon shade works best for most varieties. I test locations by placing a white sheet on the ground for a week to track actual light exposure. Also, avoid planting where water pools after rain; hostas need well-draining soil to prevent crown rot.
Root Care Technique: When loosening circling roots in Step 2, I use my fingers to gently tease them apart rather than cutting—this encourages new root growth. The 24-hour watering schedule is non-negotiable; it's the difference between plants that establish quickly and those that struggle. For extra insurance, I add a handful of mycorrhizal fungi to the planting hole to boost root development.
Layering Strategy: The 18-24 inch spacing between hostas might seem generous, but trust me—it prevents future crowding and allows air circulation that reduces disease. I always plant taller varieties toward the back, creating natural height variation. For the 6-12 inch spacing of ground covers, I use a garden flag to mark each planting spot before digging to maintain consistent spacing.
Winter Protection: That 2-inch straw mulch in cold zones isn't just decoration—it's insulation that can mean the difference between winter survival and spring loss. I only use straw (not hay) because it's weed-free and breaks down slowly. For tender varieties, I also add a layer of bubble wrap over the mulch in extreme winters, then cover with more straw to protect against freeze-thaw cycles.
Pro Tips for Hosta Plant Landscaping
- Creating a thriving hosta garden takes more than just planting—it's about strategic placement and ongoing care that transforms shade spaces into lush, dynamic displays.
- Site Selection Secrets: That 3-6 hours of filtered light is crucial—morning sun with afternoon shade works best for most varieties.
- Root Care Technique: When loosening circling roots in Step 2, I use my fingers to gently tease them apart rather than cutting—this encourages new root growth.
Frequently asked questions
Got questions about using hostas in your shade garden?
You’re not alone! Here are answers to the most common queries to help you create a lush, low-maintenance landscape with ease.
What’s the best time of year to plant hostas?
Plant hostas in early spring or early fall when soil is cool but workable. Avoid extreme heat or frost—hostas thrive when they can establish roots without stress. Spring planting gives them a full growing season, while fall lets them settle before winter dormancy.
How much shade do hostas really need?
Hostas are famously shade-tolerant but perform best in partial to full shade (2–6 hours of sunlight max). Too much sun can scorch leaves, while deep shade may reduce flowering. Test your spot: If nearby plants grow well, your hostas likely will too!
Why are my hostas getting eaten by slugs or deer?
Hostas are a buffet for pests! Slugs love tender leaves—use organic barriers like copper tape or diatomaceous earth. Deer? Try repellents with strong scents (like garlic or predator urine) or opt for deer-resistant varieties like Hosta ‘Halcyon’ or ‘Patriot’.
Can I mix hostas with other shade plants?
Pair hostas with ferns, astilbes, heucheras, or Japanese forest grass for texture. Add bulbs like fritillaries or snowdrops for seasonal color. Just ensure companions have similar water and shade needs—hostas hate competition for moisture!
Do hostas survive winter in cold climates?
Yes! Hostas are hardy perennials (zones 3–9). In harsh winters, mulch with 2–3 inches of shredded leaves or straw to protect roots. Evergreen varieties (like ‘Blue Angel’) may need extra shelter, but most bounce back beautifully in spring.
Wrapping up and next steps
Hostas are the unsung heroes of shade gardens—offering lush foliage, versatility, and year-round texture that transforms any dim corner into a vibrant retreat. 🌿 Whether you're a seasoned gardener or just starting, these plants deliver low-maintenance beauty with minimal fuss.
Ready to elevate your outdoor space? Start small: pick a few varieties, experiment with layers, and watch your garden thrive with every season!
🌱 Your Next Step:
- Sketch your design—map out hosta placements based on size, color, and light needs.
- Shop local—visit nurseries to see varieties in person and ask for pro tips!
- Plant with confidence—remember, hostas reward patience with stunning growth.