
Pruning
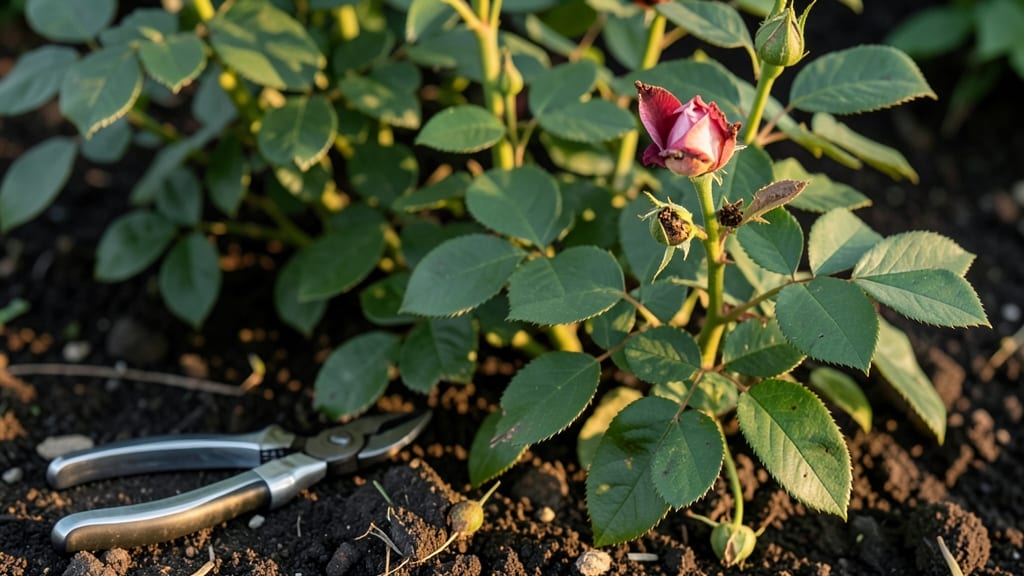
Deadheading plants in October isn’t just cleanup—it’s setting the stage for next year’s blooms while protecting tender stems from winter’s chill. 🌿 I learned this the hard way when my late-season dahlias flopped under snow because I’d left too many spent blooms.
The right cuts now mean stronger roots and fewer surprises when spring rolls around.
You’ll need sharp pruners (clean blades prevent disease) and about 30 minutes on a crisp afternoon. Focus on three key cuts: removing faded blooms just above a leaf node, trimming leggy growth back by a third, and clearing away dead foliage that could harbor pests.
The goal is to encourage new growth where it matters and avoid stressing plants before dormancy.
What you’ll end up with is plants that look tidy now and bounce back faster in spring. The stems stay sturdy under snow, and you’ll see fewer floppy blooms next season. Plus, your garden beds will look intentional even in winter’s quiet months. Ready to make those cuts?
This works for perennials, tender annuals, and even some shrubs—just avoid heavy pruning on late-season bloomers like chrysanthemums. The timing is everything: too early and you encourage new growth that won’t harden off before frost; too late and you risk winter damage. Let’s get those plants winter-ready.
📚 In This Guide
- What you need
- Instructions
- Tips and common mistakes
- Wrapping up and next steps
What you need
- ● Pruning shears: Sharp, bypass-style shears (4-6" blades) for clean cuts. Invest in a high-quality pair (e.g., Felco or Fiskars) for precision.
- ● Hand pruners: Anvil-style pruners (for thicker stems up to ½")—sterilize blades with rubbing alcohol between cuts.
- ● Garden gloves: Heavy-duty, cut-resistant gloves (e.g., Mechanix or Wolverine) to protect hands from thorns and debris.
- ● Garden waste bag: 30-gallon heavy-duty bag (or compost bin) for spent blooms and clippings.
- ● Disinfectant spray: 70% isopropyl alcohol or a horticultural disinfectant (e.g., 10% bleach solution) to prevent disease spread.
- ● Loppers: For larger stems (½"–1.5")—extendable loppers save your back!
- ● Knee pads: Cushioned pads (e.g., Gorilla Grip) for comfort during low-to-the-ground work.
- ● Magnifying glass: A 3x–5x loupe to spot hidden pests or disease on stems.
- ● Sharpener: A stone or file sharpener to maintain tool edges between seasons.
- ● Water spray bottle: For rinsing tools mid-session and keeping dust down.
- ● Closed-toe shoes: Sturdy, slip-resistant footwear (e.g., steel-toe boots or hiking shoes).
- ● Sunscreen & hat: October sun can still be sneaky—SPF 30+ and a wide-brimmed hat are musts.
- ● First-aid kit: Bandages, antiseptic wipes, and tweezers for just-in-case thorn pricks.
How to deadhead plants in October for winter success
Here's the simple method I use to prep perennials for winter—clean cuts now mean stronger blooms next spring.
✂️ Step 1: Identify and Cut Back Faded Flowers
Start with spent blooms on perennials like coneflowers, black-eyed Susans, and daylilies. Look for flowers that have lost their color or dropped petals—these are your targets. Use clean, sharp pruners to cut just above the first set of healthy leaves or where the flower stem meets the main stem.
Don't cut too far down—you're removing dead flowers, not the entire plant. The goal is to encourage new growth while keeping the plant's energy focused on root development. If you're unsure where to cut, imagine a tiny pencil eraser—cut just above that point on the stem.
✂️ Step 2: Thin Overgrown Foliage for Airflow
Next, focus on the plant's leaves and stems. If your perennials look crowded or leggy, it's time to thin them out. Look for stems that are crossing over each other or growing in awkward directions—these are the ones to remove. Cut these stems back to about 6 inches from the ground, or until you reach a healthy set of leaves.
This step is all about improving airflow and light penetration. Crowded plants hold moisture, which can lead to fungal diseases over winter. You'll know you've done it right when you can see light and air moving freely through the plant's center.
✂️ Step 3: Remove All Diseased or Damaged Growth
Finally, inspect each plant for any signs of disease, pests, or physical damage. Look for yellow leaves, brown spots, or stems that look mushy or hollow. These are red flags that need immediate attention. Using your pruners, cut these affected areas out completely, making sure to cut back to healthy tissue.
Dispose of any diseased plant material in the trash—not your compost bin. You're preventing problems next year by removing the source now. If you're dealing with a fungal issue, sterilize your pruners with rubbing alcohol between cuts to avoid spreading spores.
🌿 Step 4: Apply a Light Mulch Layer
Once you've finished deadheading and pruning, it's time to protect your plants for winter. Spread a 2-3 inch layer of mulch around the base of each plant, keeping it a few inches away from the stems. This layer will insulate roots, retain moisture, and suppress weeds.
Use organic mulch like shredded leaves, straw, or wood chips. Avoid piling mulch against the stems—this can cause rot. You'll see your plants looking tidier and better prepared for the cold months ahead.
Tips & tricks for perfect fall plant pruning
Fall garden prep is all about precision—these small details make the biggest difference for winter survival.
Tool Prep: Sterilize your pruners with rubbing alcohol between cuts, especially when dealing with diseased plants in Step 3. I learned this the hard way after spreading fungal spores to healthy plants! Clean tools also make sharper cuts that heal faster.
Visual Cue for Step 1: When cutting back faded blooms, look for the first set of healthy leaves below the flower stem. If you're unsure, imagine a pencil eraser—cut just above that point. This ensures you're not removing too much foliage while still encouraging new growth.
Mulch Layer Precision: The 2-3 inch layer in Step 4 is perfect for insulation, but don't pile it against stems. Keep it about 2 inches away to prevent moisture buildup that leads to rot. I use a ruler to check depth—consistency matters more than you'd think!
Seasonal Timing: October is ideal for this process because it gives plants time to recover before winter dormancy. If you're in a warmer climate, you might extend this until early November, but don't wait too long—frozen ground makes pruning difficult.
Pro Tips for Deadheading Plants October
- Fall garden prep is all about precision—these small details make the biggest difference for winter survival.
- Tool Prep: Sterilize your pruners with rubbing alcohol between cuts, especially when dealing with diseased plants in Step 3.
- Visual Cue for Step 1: When cutting back faded blooms, look for the first set of healthy leaves below the flower stem.
Frequently asked questions
Got questions about deadheading in October?
You’re not alone! Here are answers to the most common concerns—plus a few pro tips to keep your garden thriving.
What does "deadheading" actually mean?
Deadheading is simply removing spent or fading flowers from your plants. By snipping off blooms that have wilted or finished blooming, you encourage new growth and redirect the plant’s energy toward winter prep instead of seed production. Think of it as giving your plants a little "reset" for the colder months!
Is October too late to deadhead my plants?
Not at all! October is a great time to deadhead hardy perennials and annuals before they go dormant. For tender plants (like geraniums or petunias), stop deadheading by mid-October to avoid encouraging new growth that won’t survive frost. Focus on perennials like coneflowers, black-eyed Susans, and sedum—they’ll thank you with stronger roots for next spring!
How do I know which stems to cut—and which to leave?
Use these quick rules:
- Perennials: Cut back to the first set of healthy leaves or a strong pair of buds below the bloom.
- Annuals (like marigolds or zinnias): Snip stems just above a leaf node to promote bushier growth.
- Seed heads (e.g., coneflowers): Leave them if you want winter interest or birds to enjoy, but remove them if you prefer tidy beds.
What if my plant looks sad after deadheading?
Don’t panic! A little post-deadheading wilt is normal as the plant adjusts. Water deeply after pruning to help it recover, and avoid fertilizing—your plant is entering dormancy and doesn’t need extra nutrients. If leaves yellow or stems look mushy, you might’ve cut too aggressively. Next time, aim for just the blooms!
Are there plants I shouldn’t deadhead in October?
Yes! Skip deadheading for:
- Plants with seed pods you want to collect (like foxglove or lupines).
- Evergreens (like boxwood or holly)—they don’t bloom like perennials, so no deadheading is needed.
- Plants already damaged by frost—wait until spring to prune.
Wrapping up and next steps
Deadheading your plants in October isn’t just about tidying up—it’s your secret weapon for stronger, more vibrant blooms next season! By removing spent flowers, you redirect energy to roots and new growth, ensuring your garden thrives even in winter.
Plus, it keeps pests at bay and maintains that picture-perfect curb appeal.
Now that you’re armed with the 3 key cuts and tips, grab those pruners and get to work! Ready to take your garden to the next level? Check out our seasonal pruning calendar to stay ahead of the game all year round. Happy pruning! 🌿✂️