
Propagation
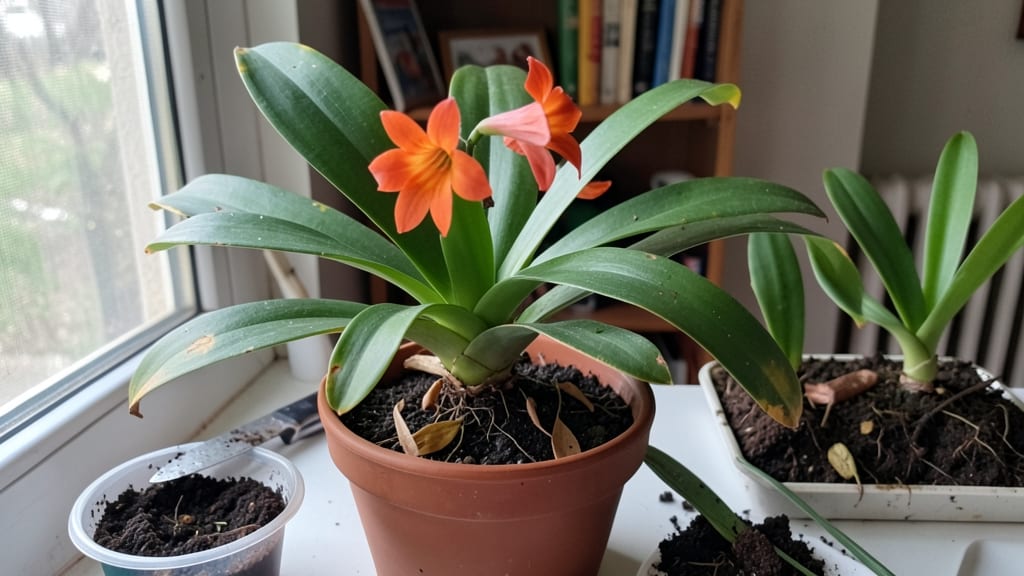
Mastering clivia plant propagation through layering is the easiest way to multiply these striking indoor beauties without stress—here’s how I grew my collection from two plants to a dozen. most of the work while you provide the right conditions.
The process mimics how clivia grows in the wild, where offsets form along the rhizome and eventually root on their own.
You’ll need a mature clivia plant with visible offsets, a sharp knife or pruning shears, and a well-draining potting mix. The layering method works best in spring or early summer, when the plant is actively growing.
Choose a healthy offset that’s at least 2 inches long, as these have the best chance of establishing roots quickly. Sterilizing your tools prevents infection, and a small amount of rooting hormone can speed things up—though it’s not strictly necessary.
Once you’ve made the cut and buried the offset just enough to cover its base, keep the soil consistently moist but never soggy. Place the plant in bright, indirect light and maintain humidity levels around 50-60%.
Within 8-12 weeks, you’ll see new roots forming, and the offset can be separated and potted up. The result? Thriving clivia plants that look just like the parent, ready to brighten up your home.
This method works equally well for beginners and experienced gardeners, making it a foolproof way to grow more clivia without the risk of transplant shock. Whether you’re expanding your collection or sharing plants with friends, layering ensures healthy, established new plants every time. Let’s get started with the step-by-step guide!
📚 In This Guide
- What you need
- Instructions
- Tips and common mistakes
- Wrapping up and next steps
What you need
- ● Mature Clivia plant: Choose a healthy, well-established plant (at least 3–5 years old) with visible offsets or "pups" at the base.
- ● Sharp, sterilized knife or pruning shears: For clean cuts—think sanitized to prevent disease (rubbing alcohol works!).
- ● Well-draining potting mix: A blend of 50% peat moss or coconut coir, 30% perlite or pumice, and 20% sand or orchid bark (sterilized). Clivia hates soggy roots!
- ● Small pots (3–4 inches in diameter): 2–3 pots, depending on the number of offsets. Ensure they have drainage holes.
- ● Sphagnum moss or perlite: For covering the cut area and keeping it moist during rooting (1–2 cups).
- ○ Plastic wrap or clear dome: To create a humidity tent (optional but helpful for faster rooting).
- ● Watering can or spray bottle: For gentle hydration—no soaking!
- ○ Rooting hormone (optional but recommended): A gel or powder to boost root growth (e.g., Clonex or Rootone).
- ● Timing: Propagate in spring or early summer when the plant is actively growing.
- ● Temperature: Keep the area warm (65–75°F / 18–24°C)—Clivia loves warmth!
- ● Light: Bright, indirect light (no harsh sun). A north- or east-facing window is ideal.
- ● Patience: Rooting can take 4–12 weeks—resist the urge to peek too often!
Step-by-Step instructions for clivia plant propagation
This gentle layering method produces healthy new clivia plants without stressing the mother plant.
Choose a Healthy Stem for Layering
Select a mature clivia stem with at least three leaves and a visible node where roots will form. The stem should be sturdy but flexible, not brittle. I look for stems that have produced flowers before—these tend to root more reliably. Avoid stems with yellowing leaves or signs of disease, as those weaknesses will carry over to the new plant.
Gently bend the stem downward until it touches the soil surface. You’ll feel slight resistance as the stem begins to curve naturally. The goal is to create a 45-degree angle without breaking the stem. If the stem snaps easily, it’s not ready for propagation yet. Wait until next season when new growth appears.
Bury the Stem and Secure It
Using your fingers, create a small trench in the soil about 1 inch deep along the stem. Place the bent portion of the stem into the trench, ensuring the node (the bump where leaves meet the stem) is fully covered. Press the soil lightly around the stem to hold it in place—you want firm contact but no crushing.
To keep the stem buried, I use a small U-shaped wire or bent piece of wire (like a paperclip) to pin it down. This prevents the stem from popping back up as it grows. If you don’t have wire, a small rock can work, but it’s less secure. Water the soil lightly after securing the stem to help it settle into place.
Maintain Moisture and Light Conditions
Keep the soil consistently moist but not soggy for the first 6-8 weeks. Clivia roots need steady moisture to form, but standing water will rot the stem. I check the soil every 2-3 days—if the top inch feels dry, give it a light watering. Avoid wetting the leaves, as clivia is prone to fungal issues in damp conditions.
Place the plant in bright, indirect light. A north or east-facing window is ideal—direct sun can scorch the leaves while they’re still developing roots. If your home has low light, supplement with a grow light for 12 hours daily. You’ll know the stem is happy when new growth appears at the tip within 4-6 weeks.
Encourage Root Formation and Separation
After 8-12 weeks, gently tug on the layered stem near the buried node. If you feel resistance, roots have formed. If not, wait another 2-3 weeks before testing again. I like to wait until the new stem has 2-3 inches of growth before separating—this ensures the baby plant has enough energy to survive on its own.
Using a small knife or your fingers, carefully cut the stem just below the new roots. Remove the baby clivia from the soil and pot it in its own container with well-draining potting mix. Water lightly and place it in the same bright, indirect light. The first few weeks are critical—keep the soil moist but not waterlogged as the roots establish.
Care for New Clivia Plants
For the first 3 months, focus on keeping the soil consistently moist and the environment stable. Avoid fertilizing during this time—new roots are sensitive to salts. Once the plant shows signs of new growth (usually after 6-8 weeks), you can resume normal clivia care with a balanced fertilizer every 6-8 weeks in spring and summer.
Clivia plants grown from layers mature faster than those grown from seed, often flowering within 2-3 years instead of 5-7. Watch for the first signs of flower buds in early spring—this is your reward for patience. If you propagated multiple stems, you’ll have a collection of clivia plants ready to brighten up different corners of your home.
Tips & tricks for perfect clivia plant propagation
A few simple techniques will help you avoid common pitfalls and maximize success with your clivia propagation.
Stem Selection Tip: Look for stems with at least three leaves that have already produced flowers—they're far more likely to root successfully. In Step 1, when bending the stem, you'll know it's the right one when it bends gently but resists breaking completely. I've found that stems with visible nodes (the small bumps where leaves attach) are particularly responsive, often producing roots within the 8-12 week window mentioned in Step 4.
Moisture Management Strategy: During the critical 6-8 week moisture phase in Step 3, I recommend using a spray bottle to mist the soil rather than watering from above. This prevents wetting the leaves, which can lead to fungal issues. The top inch of soil should feel like a damp sponge—not dripping wet. You can also place the pot on a tray of pebbles with water to maintain consistent humidity without overwatering.
Light Conditioning: If you're using a grow light as mentioned in Step 3, position it about 6 inches above the plant and adjust the height as the new growth appears. The 12 hours of daily light should be split into morning and evening sessions to mimic natural daylight patterns. I've noticed that clivia stems exposed to consistent light from the start develop roots about 2 weeks earlier than those in fluctuating light conditions.
Root Testing Technique: When testing for root formation in Step 4, I recommend doing the tug test at slightly different angles around the buried node. If you feel resistance in one direction but not another, roots are likely forming in that specific area. This targeted approach helps you identify exactly where roots have developed, making the separation process in Step 4 much cleaner and less damaging to both the mother plant and the new cutting.
Pro Tips for Clivia Plant Propagation
- A few simple techniques will help you avoid common pitfalls and maximize success with your clivia propagation.
- Stem Selection Tip: Look for stems with at least three leaves that have already produced flowers—they're far more likely to root successfully.
- Moisture Management Strategy: During the critical 6-8 week moisture phase in Step 3, I recommend using a spray bottle to mist the soil rather than watering from above.
Frequently asked questions
Got questions about propagating your Clivia plant? You’re not alone!
Here are some of the most common queries—and their straightforward answers—to help you succeed with layering or other methods.
How long does it take for a Clivia offset to root?
With patience, you’ll typically see roots forming in 4–8 weeks when using the layering method. Keep the soil lightly moist (not soggy!) and avoid disturbing the offset. Once roots are 1–2 inches long, it’s safe to separate and pot the new plant. Pro tip: Bottom heat (like a heating mat) can speed up rooting!
Can I propagate Clivia from seeds instead of offsets?
Yes, but it’s much slower—seed-grown plants take 5–7 years to bloom! Offsets (pups) are the easiest way, as they’re genetically identical to the parent. If you’re set on seeds, collect them fresh from ripe capsules, sow in a well-draining mix, and keep humidity high. Warning: Seedlings are delicate—expect a higher failure rate.
Why did my Clivia offset turn yellow or mushy?
Yellowing or mushiness usually signals overwatering or rot. Check for soggy soil—Clivias hate wet feet! If caught early, trim away mushy parts, let the soil dry, and repot in fresh, gritty mix. For prevention, water only when the top 2 inches of soil are dry. Quick fix: Add perlite or orchid bark to improve drainage.
When is the best time to separate Clivia offsets?
The ideal window is late spring or early summer (May–June), when the plant is actively growing. Avoid winter—this is its dormant period, and stressing it then can harm both parent and pup. If you must separate in fall, do so before the first frost. Timing tip: Wait until the offset has 3–4 leaves and its own roots.
What if my Clivia doesn’t produce offsets naturally?
Don’t worry—some Clivias are slow to pup or may never produce offsets on their own. Try these tricks:
- Age: Mature plants (5+ years) are more likely to offset.
- Light: Bright, indirect light encourages growth.
- Division: Gently separate the rhizome (if possible) to stimulate new growth.
- Patience: Some varieties (like Clivia miniata) are offset-prolific!
Wrapping up and next steps
Propagating your clivia plant through layering is a rewarding way to expand your collection with minimal stress—both for you and the plant! 🌱 With patience and the right techniques, you’ll soon enjoy vibrant new clivias thriving in their own space.
Now that you’re armed with the knowledge, take the first step and choose a healthy clivia to begin your propagation journey.
Ready to grow? Start layering today and watch your green thumb shine! 🌟