
Planting
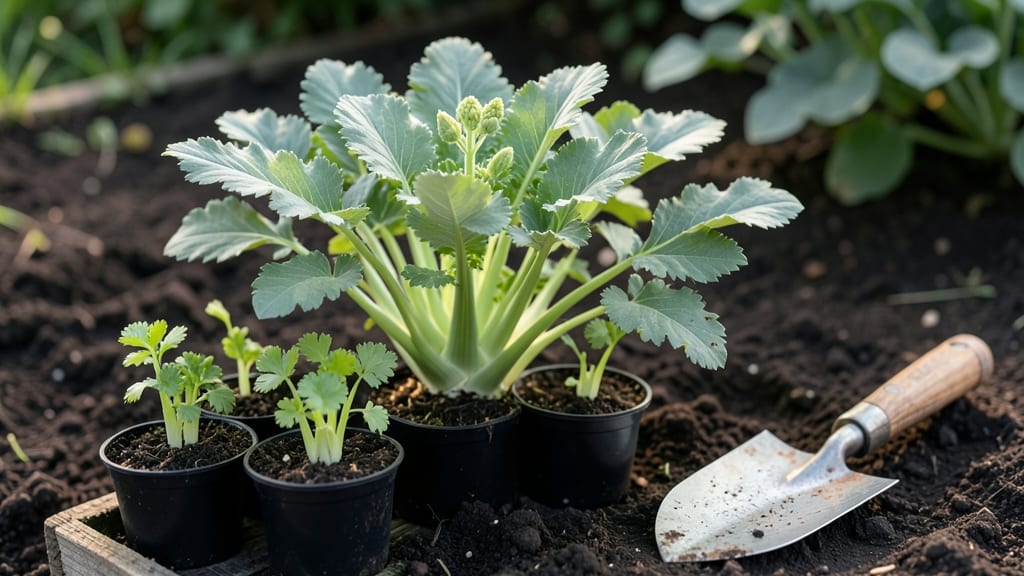
Here are celery planting tips that’ll have you harvesting crisp stalks in just 10–14 days—no more waiting months for stubborn sprouts to finally break through. 🌱 I learned the hard way that regular seeds often rot in cold soil, but with the right prep, you’ll... see those first pale green shoots breaking through in less than two weeks.
The secret isn’t fancy equipment; it’s moisture, warmth, and patience in the right amounts.
Start indoors 6-8 weeks before your last frost in small pots filled with moist, sterile seed-starting mix. Plant seeds just ¼-inch deep and keep them warm (around 70°F) until they sprout.
Outdoors, wait until soil temps hit 50°F or warmer—celery hates cold, and slow germination is the first sign of trouble. Once sprouted, thin seedlings to 12 inches apart for thick, leafy stalks that won’t compete for space.
📚 In This Guide
- What you need
- Instructions
- Tips and common mistakes
- Wrapping up and next steps
What you need
- ● Celery seeds – Choose Apium graveolens varieties like Utah or Tall Utah Improved for best results. Buy 1–2 packets (about 1,000–2,000 seeds) for a small garden.
- ● Seed-starting mix or potting soil – Use a lightweight, well-draining mix (e.g., 50% peat moss, 30% perlite, 20% compost). A 5-gallon bag is ideal for starting seeds.
- ● Containers or seed trays – Opt for biodegradable pots (2–3 inches deep) or a seed tray with cell inserts (10–20 cells).
- ● Garden soil or raised bed mix – Amend with compost (2–3 inches) and a balanced fertilizer (5-10-5 ratio) for nutrient-rich soil.
- ● Watering can or spray bottle – Keep soil consistently moist (not soggy!). A fine-mist sprayer works best for seeds.
- ● Plastic wrap or humidity dome – Helps maintain 80–90% humidity for germination. A clear plastic bag or store-bought dome suffices.
- ● Grow lights or sunny windowsill – Celery seeds need 6–8 hours of light daily. A LED grow light (12–15 inches above seedlings) works indoors.
- ● Transplanting tools – A small hand trowel and gardening gloves make the process easier.
- ● Seedling heat mat – Speeds up germination if your space is below 70°F (21°C).
- ● Fertilizer spray (fish emulsion or seaweed) – Boosts early growth when seedlings are 2–3 inches tall.
- ● Mulch (straw or shredded leaves) – Retains moisture and suppresses weeds in outdoor beds.
- ● Support stakes or cages – Helps tall varieties stay upright as they mature.
- ● pH test kit – Celery prefers pH 6.0–7.0. Adjust soil if needed with lime or sulfur.
Step-by-step instructions for planting celery with fast germination
Here's how I guarantee quick sprouts and thick, leafy celery stalks every time.
🌱 Step 1: Soak Seeds Overnight for Faster Germination
Celery seeds have tough outer shells that slow germination. Place the ¼ cup celery seeds in a small bowl and cover them with warm water. Let them soak for 12-24 hours—this softens the seed coat and speeds up sprouting. You'll know they're ready when they look slightly swollen and plump.
After soaking, drain the seeds and spread them on a paper towel to dry slightly. This prevents them from sticking together when planting. I like to do this the night before planting so the seeds are ready to go in the morning.
🪴 Step 2: Prepare Warm, Moist Soil for Planting
Fill your seed trays or containers with seed-starting mix and moisten it until it feels like a damp sponge. Celery thrives in warm soil, so I place the trays on a seedling heat mat set to 70-75°F for 2-3 days before planting. This warmth encourages faster germination.
Make small furrows about ¼ inch deep and 1 inch apart using your finger or a small stick. Space them evenly so you can easily thin seedlings later. The goal is to create a cozy, warm bed for those soaked seeds.
💧 Step 3: Plant Seeds and Maintain Consistent Moisture
Drop 2-3 seeds into each furrow, spacing them about ½ inch apart. Cover them lightly with a thin layer of soil—just enough to hide the seeds but not bury them too deep. Press gently to ensure good seed-to-soil contact, which helps with germination.
Mist the soil surface with a spray bottle until it's evenly moist but not soggy. Place a clear plastic dome or wrap a plastic bag loosely over the tray to retain humidity. Keep the soil consistently moist—never let it dry out. Check daily and mist if the surface feels dry to the touch.
☀️ Step 4: Provide Warmth and Light for Germination
Keep the trays in a warm spot with a grow light or under bright, indirect sunlight. Celery seeds germinate best in temperatures between 65-75°F. You should see tiny sprouts in 7-14 days, though some varieties may take up to 3 weeks.
Once the seedlings emerge, remove the plastic cover immediately to prevent damping-off disease. Place the trays under a grow light for 14-16 hours per day, keeping it about 2-3 inches above the seedlings. This prevents leggy growth and ensures strong, healthy plants.
✂️ Step 5: Thin Seedlings and Transplant for Thick Stalks
When seedlings reach 2 inches tall and have 2-3 true leaves, thin them so only the strongest plant remains in each spot. Use small scissors to snip the extra seedlings at soil level—this reduces stress on the remaining plants.
After thinning, transplant the seedlings into larger containers or directly into the garden, spacing them 12-18 inches apart. Celery needs plenty of room to develop thick, leafy stalks. Keep the soil consistently moist and mulch around the plants to retain moisture and suppress weeds.
Tips & tricks for perfect celery planting
Fast germination isn't luck—it's science. Here's how to give your celery seeds the best possible start for those thick, leafy stalks you're dreaming of.
Soak Smart: That 12-24 hour soak is your secret weapon. Use warm water (not hot) and change it after 12 hours to prevent bacteria buildup. I've found that soaking in a glass bowl makes it easier to spot when seeds become plump and ready. Pro tip: Add a drop of dish soap to the water—it helps break down the tough seed coats even faster without harming the seeds.
Heat Hack: The 70-75°F warmth from that seedling heat mat is crucial, but don't overlook the 2-3 days before planting. This pre-warming creates the perfect environment for those soaked seeds to start their growth journey. If you don't have a heat mat, place your trays on top of your fridge or near a sunny window during the day—just monitor temps closely to stay in that sweet spot.
Light Strategy: Those 14-16 hours of grow light are non-negotiable for preventing leggy seedlings. I position my light just 2-3 inches above the trays and raise it gradually as seedlings grow. For natural light, place trays on a south-facing windowsill where they'll get bright but indirect sunlight. The key is consistent light—celery won't tolerate darkness or sudden light changes during germination.
Thinning Technique: When you're thinning those 2-inch seedlings, don't just pull—snip at soil level with clean scissors. This prevents disturbing the roots of your remaining plants. I always thin on a cloudy day to reduce stress on the seedlings. The goal is to leave the strongest plant in each spot, giving it room to develop those thick, leafy stalks we all want.
Pro Tips for Celery Planting Tips
- Fast germination isn't luck—it's science.
- Soak Smart: That 12-24 hour soak is your secret weapon.
- Heat Hack: The 70-75°F warmth from that seedling heat mat is crucial, but don't overlook the 2-3 days before planting.
Frequently asked questions
Got questions about growing celery? You’re not alone! Here are answers to the most common celery planting tips queries to help you grow thick, leafy stalks with ease.
When is the best time to plant celery?
Celery thrives in cool weather. Start seeds indoors 10–12 weeks before your last frost (typically March–April in most climates). Transplant seedlings outdoors after soil warms to 50–60°F (10–15°C)—usually late spring or early fall. Avoid planting in summer’s heat, or stalks may bolt.
How often should I water celery plants?
Celery loves consistent moisture—water deeply 2–3 times per week (more in hot/dry spells). Keep soil evenly damp but not soggy to prevent root rot. Mulch around plants to retain moisture and suppress weeds. Pro tip: Yellowing leaves? Often a sign of underwatering!
Can I grow celery from store-bought stalks?
Yes! Save the bottom 2 inches of a celery stalk, trim leaves, and place in water until roots sprout (2–3 weeks). Then transplant to soil. For best results, use organic, pesticide-free celery. Note: Homegrown celery may not match grocery-store size but tastes fresher and more flavorful!
Why aren’t my celery seeds germinating?
Celery seeds need warmth (70–80°F/21–27°C) and patience—germination can take 2–4 weeks. If seeds fail to sprout:
- Check seed viability (test in damp paper towel).
- Ensure soil stays moist but not waterlogged.
- Try a heat mat or sunny windowsill for indoor starts.
- Consider pre-soaking seeds in warm water for 24 hours.
How do I protect celery from pests?
Celery attracts aphids, slugs, and cabbage worms. Prevent issues with:
- Row covers to block flying pests.
- Handpick slugs or use beer traps (bury a shallow dish of beer).
- Spray neem oil or insecticidal soap for aphids.
- Rotate crops yearly to reduce soil-borne pests.
Pro tip: Plant celery near dill or onions to deter pests naturally!
Wrapping up and next steps
Growing your own celery is easier than you think—with the right celery planting tips, you’ll soon be harvesting thick, leafy stalks that rival store-bought (or even beat them!).
Remember: patience, consistent moisture, and a little shade go a long way. Whether you’re a seasoned gardener or a curious beginner, these tricks will set you up for success.
Now that you’re armed with know-how, grab those seeds and get planting! 🌱 Start small, experiment with your setup, and don’t forget to share your progress—your future crisp, homegrown celery will be worth every effort. Happy growing!