
Pruning
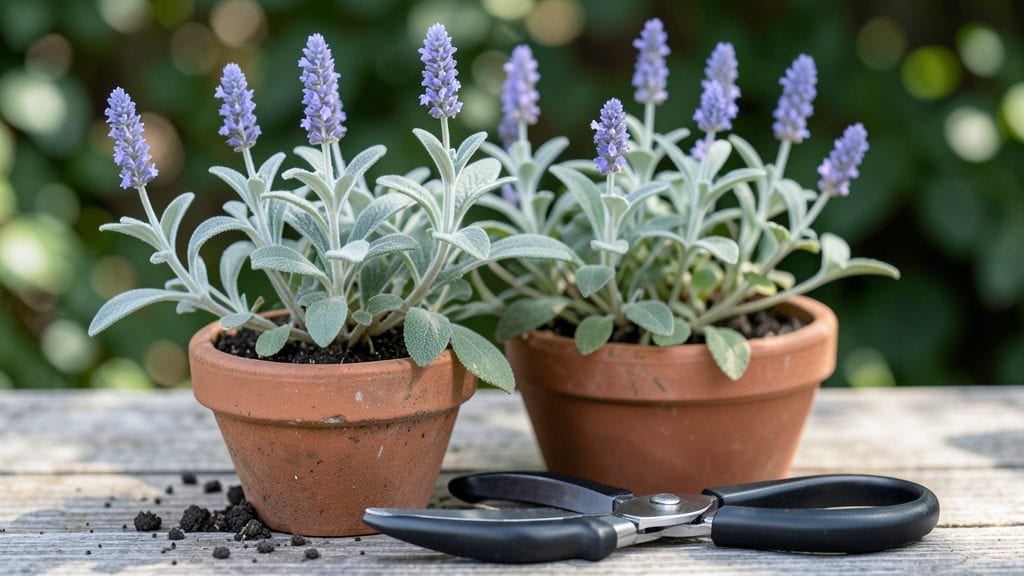
Catmint plant pruning isn’t just about keeping your plants tidy—it’s the secret to year-round blooms that make your garden smell like a meadow. 🌿 I’ve learned the hard way that skipping these three precision trims means fewer flowers and more leggy stems by summer.
The right cuts at the right time transform catmint from a one-season showstopper into a six-month bloomer that hummingbirds can’t resist.
You’ll need just three tools: sharp pruning shears (dull blades tear stems), gardening gloves (catmint’s hairs can irritate skin), and a small bucket for clippings.
Timing matters most—prune right after the first flush of blooms in spring, again in midsummer to encourage a second wave, and a harder cut back in late fall to prep for next year. Each trim takes 10 minutes and makes a visible difference in plant health.
After pruning, your catmint will bounce back with new growth within 2-3 weeks, and the flowers will be denser and more vibrant. The key is cutting just above a set of leaves or a bud, never into bare wood, and always using clean tools to prevent disease.
I’ve seen plants go from ragged to lush and bushy in just one season with this method.
This works for both Nepeta varieties and the taller Russian sage types, though the cutting angles differ slightly. Whether you’re dealing with a sprawling ground cover or a tall border plant, the same principles apply. Let’s get those shears ready—your catmint’s about to put on its best show yet.
📚 In This Guide
- What you need
- Instructions
- Tips and common mistakes
- Wrapping up and next steps
What you need
- ● Bypass pruners (sharp, clean, and sterilized with rubbing alcohol) – 1 pair (for clean cuts on stems up to ½ inch thick).
- ● Hand pruners or shears (for smaller stems and trimming leaves) – 1 pair (ergonomic grip recommended).
- ● Garden gloves (nitrile or leather, cut-resistant) – 1 pair (protects hands from thorns and sap).
- ● Disinfectant (rubbing alcohol or bleach solution) – small bottle (to sterilize tools between cuts).
- ○ Garden twine or plant ties – small roll (optional, for securing heavy stems post-pruning).
- ● Garden waste bag – 1-2 bags (for trimmings; biodegradable preferred).
- ● Loppers (for thicker stems, if your catmint has woody growth) – 1 pair.
- ● Hose with nozzle – to rinse tools and clean sap off hands.
- ● Plant food or compost – small bag (to nourish roots after pruning).
- ● Notebook & pen – to track pruning dates and plant responses.
- ● Knee pad or stool – for comfort if pruning larger plants.
Instructions for pruning catmint to extend its blooming season
Here's the method I've used for years to keep catmint flowering nonstop—no deadheading headaches, just clean cuts and vibrant regrowth.
✂️ Step 1: First Trim After Initial Flowering
Wait until the first flush of flowers begins to fade—about one-third of the blooms have dropped—but before the stems become woody. Use sharp, clean pruners to cut back the entire plant by one-third its height. This encourages a fresh round of growth from the base rather than letting the plant expend energy on seed production.
Remove any dead or damaged stems completely to the ground level. I always make cuts just above a set of healthy leaves or buds, never at a bare stem. This ensures the plant has energy reserves to regenerate quickly. After trimming, water deeply to help the plant recover and stimulate new growth.
✂️ Step 2: Mid-Season Renewal Cut
About 6-8 weeks after the first trim, you'll notice new growth but fewer flowers. This is your signal for the second cut. Again, remove about one-third of the plant's height, but this time focus on shaping it into a more compact form. Catmint naturally grows bushy, but pruning encourages denser foliage and more abundant blooms.
Pay special attention to any leggy stems that have stretched toward the light. Cut these back to encourage a fuller, more balanced shape. If your catmint has started to look ragged, this is the perfect time to tidy it up. Avoid cutting into old wood—if a stem feels hard or hollow, it won't regrow, so trim it back to younger, softer growth.
✂️ Step 3: Late-Season Light Pruning for Winter Prep
As temperatures drop and growth slows, give your catmint a final light trim in late fall, just before the first hard frost. Cut back the stems by about half their height, but leave the lower foliage intact. This protects the plant's base from cold damage and ensures it has energy stored for next year's growth.
Remove any dead or diseased stems completely. If your catmint is in a pot, you can also trim the roots slightly to encourage a more compact growth habit. Mulch around the base with 2-3 inches of organic mulch to insulate the roots over winter. This step is crucial for perennial catmint varieties, as it helps them survive harsh winters and bounce back stronger in spring.
⏰ Step 4: Post-Pruning Care for Year-Round Blooms
After each major trim, fertilize lightly with a balanced, 10-10-10 fertilizer to support new growth. Water consistently but avoid overwatering—catmint is drought-tolerant once established, and soggy soil can lead to root rot. Within 3-4 weeks, you should see new shoots emerging from the base, signaling successful regrowth.
Monitor your catmint regularly for signs of stress, like yellowing leaves or wilting. If you notice these, adjust your watering or check for pests like spider mites, which love dry conditions. A light spray of water on hot days can help deter pests and keep the foliage looking fresh. With these precision trims, your catmint will reward you with blooms from early summer well into fall—and sometimes even through winter in milder climates.
Tips & tricks for perfect catmint pruning
These precision techniques will transform your catmint from a seasonal showstopper to a year-round blooming machine—no guesswork required.
Tool Selection: Invest in a pair of bypass pruners with sharp, clean blades—they make precise cuts that heal faster than dull tools. I've ruined more catmint stems than I care to admit with nicks and tears from cheap scissors. After each use, wipe the blades with rubbing alcohol to prevent the spread of disease between cuts. For larger stems, upgrade to felco pruners—they cut through woody growth like butter while leaving a smooth finish.
Timing Secret: The one-third height reduction in Steps 1 and 2 works best when you can see 10-15% of the flowers starting to fade, not when they're completely spent. I learned this the hard way after shearing plants too early—new growth came back leggy and sparse. For the late fall trim, mark your calendar for 2-3 weeks before your first frost date. This gives the plant time to harden off before winter while still protecting the base.
Shape Strategy: Step 2 is where you sculpt your catmint's future shape. I recommend cutting at a 45-degree angle just above a leaf node when shaping—this creates a larger surface area for water absorption and faster regrowth. For bushier plants, alternate cuts between the top and sides to encourage even growth. If your catmint starts looking lopsided, focus extra cuts on the denser side to balance it out.
Winter Protection: That 2-3 inch mulch layer in Step 3 isn't just decoration—it's insulation. For potted catmint, move containers to a sheltered spot or wrap the pots in burlap to protect roots from temperature swings. In particularly cold climates, consider adding a lightweight frost cloth over the mulch for extra protection. The goal is to mimic the plant's natural winter dormancy while keeping roots from freezing.
Pro Tips for Catmint Plant Pruning
- These precision techniques will transform your catmint from a seasonal showstopper to a year-round blooming machine—no guesswork required.
- Tool Selection: Invest in a pair of bypass pruners with sharp, clean blades—they make precise cuts that heal faster than dull tools.
- Timing Secret: The one-third height reduction in Steps 1 and 2 works best when you can see 10-15% of the flowers starting to fade, not when they're completely spent.
Frequently asked questions
Got questions about keeping your catmint lush and blooming?
Here are answers to the most common ones—so you can prune like a pro!
When is the best time to prune catmint for maximum blooms?
Prune catmint twice a year: early spring (just as new growth appears) and right after the first flush of flowers (late spring/early summer). This encourages bushier growth and nonstop blooms! Avoid heavy pruning in fall—let the plant rest for winter.
How much should I cut back catmint during each pruning?
For spring pruning, trim back about 1/3 of the plant to encourage fresh, vigorous growth. For post-bloom pruning, cut back spent flowers by half to promote a second (or third!) wave of blooms. Never trim more than 50% of the plant at once—this can stress it.
What if I skip pruning—will my catmint still grow?
Yes, but it’ll be less bushy and may bloom less! Pruning removes spent flowers, encourages denser foliage, and prevents the plant from becoming leggy. Think of it like a haircut—your catmint stays happy, healthy, and full of life!
Can I prune catmint too much? What are the signs?
Over-pruning happens when you cut back more than 50% of the plant or prune too late in the season. Signs include bare stems, slow regrowth, or no new blooms. If this happens, reduce pruning next time and fertilize lightly to help recovery.
Is there a difference between pruning woolly and common catmint?
Not much! Both varieties respond well to the same pruning rules, but woolly catmint (Nepeta grandiflora) may benefit from slightly earlier spring pruning since it’s more tender. Always check your specific variety’s care tag for tweaks.
Wrapping up and next steps
Pruning your catmint plant is the secret to lush, long-lasting blooms that’ll turn heads in your garden! 🌿 By mastering the three precision trims—early spring, mid-summer, and late fall—you’ll encourage healthy growth, prevent woody stems, and keep those fragrant purple spikes thriving.
With the right tools, timing, and technique, you’re well on your way to a show-stopping display year after year.
Ready to take your catmint game to the next level? Start with a quick health check—remove any dead or diseased stems now, and then plan your first spring trim for early March. Your garden (and your neighbors!) will thank you.