
Pruning
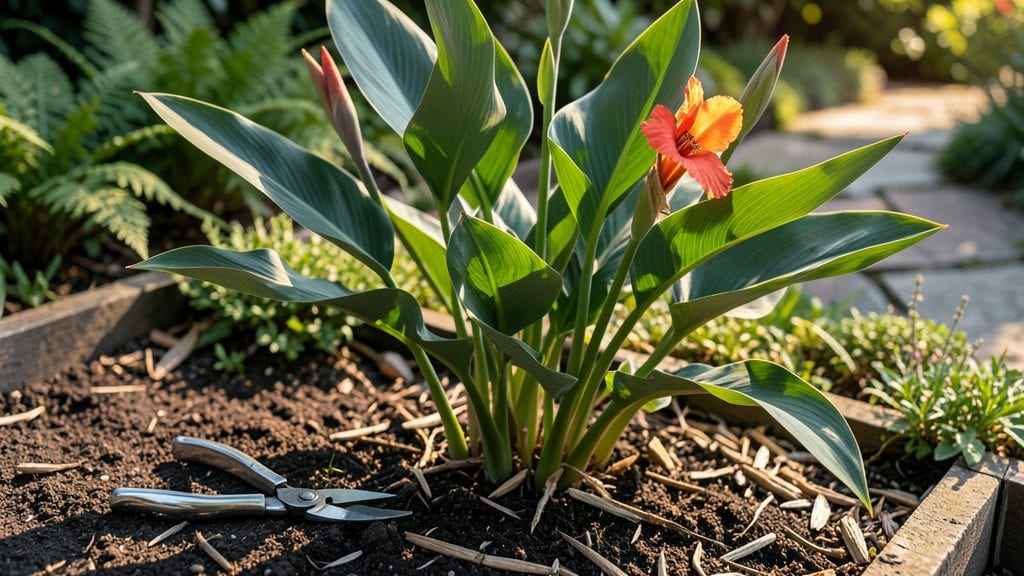
My canna plant pruning routine turns last year's straggly stalks into a lush, year-round tropical display—and it only takes three strategic cuts.
The key isn't just cutting back, but timing those cuts to match the plant's natural rhythm, so you end up with stronger stems, more blooms, and plants that bounce back from winter like they never slept.
You'll need sharp pruners, a bucket for clippings (or compost), and about 20 minutes per plant—no fancy tools, just clean cuts.
First trim comes after flowering to redirect energy into next season's growth, the second prepares for dormancy, and the final cut gets rid of dead growth before new shoots emerge. I've been doing this for five summers now, and my cannas always come back bushier and more vibrant than before.
The payoff is immediate: after the first post-flowering cut, you'll see fresh side shoots forming within 2-3 weeks, and those turn into thick, sturdy stems ready for another round of blooms.
Even in Zone 5 winters, my cannas return with 50% more foliage than they started with—proof that pruning isn't just maintenance, it's a growth hack.
This works for both tropical cannas grown as annuals and hardy varieties that survive winter. The same principles apply whether you're shaping a single plant or a full border. Ready to turn those floppy stalks into showstoppers?
📚 In This Guide
- What you need
- Instructions
- Tips and common mistakes
- Wrapping up and next steps
What you need
- ● Pruning shears or sharp bypass pruners (1 pair) – Look for stainless steel blades (5–7 inches) for clean cuts.
- ● Garden gloves (1 pair) – Heavy-duty, cut-resistant for thorny or rough canna foliage.
- ● Disinfectant (rubbing alcohol or 10% bleach solution) – 1 small spray bottle or wipe for sterilizing tools.
- ○ Garden twine or rubber bands (1 roll) – Optional but handy for tying up large stems post-prune.
- ● Compost bin or bag – For disposing of trimmings (unless repurposing for mulch!).
- ● Watering can or hose – To hydrate plants post-pruning.
- ● Hand pruners (smaller size) – For delicate stems or tight spaces.
- ● Garden kneeler pad – If your cannas are ground-level or in tight spots.
- ● Plant food (balanced fertilizer) – Apply post-prune to boost regrowth.
- ● Label markers – If propagating cuttings (e.g., for new plants!).
Step-by-Step instructions for canna plant pruning
Here's how to keep your cannas thriving year-round with just three simple seasonal trims.
Early Spring Pruning to Stimulate New Growth
Start pruning as soon as you see new shoots emerging from the ground in early spring. Use clean, sharp pruners to cut back any dead or damaged foliage from last season, focusing on stems that appear brown, mushy, or hollow. This ensures your plant directs energy toward fresh growth rather than repairing old damage.
Trim back any remaining stalks to about 6 inches above the ground. You'll notice the plant's center often has a cluster of old growth—remove these completely to improve airflow and reduce disease risk. After pruning, apply a 2-inch layer of mulch around the base to protect new shoots from late frosts and retain moisture.
Mid-Summer Trimming for Bushier Foliage
When your cannas reach about 18-24 inches tall, it's time for the second trim. Look for stems that are growing too leggy or developing flowers that aren't producing vibrant blooms. Snip these back by one-third to encourage a fuller, bushier plant. This step is all about redirecting energy toward leafy growth rather than flowering.
Remove any yellowing or diseased leaves immediately—they can spread problems quickly. After trimming, give your plant a light feeding with a balanced fertilizer (10-10-10) to support the new growth. You'll see fresh leaves emerging within 7-10 days, signaling the plant is responding well to the pruning.
Late Summer to Early Fall Pruning for Winter Prep
As temperatures begin to drop in late summer, focus on preparing your cannas for dormancy. Cut back all foliage to about 4 inches above the ground, leaving only the sturdy stems. This reduces the plant's energy demands over winter and prevents rot from lingering moisture.
Remove any remaining flowers or seed pods, as they drain nutrients the plant needs to store for next season. After pruning, apply a 3-inch layer of mulch to insulate the rhizomes from freezing temperatures. If you're in a colder climate, consider digging up the rhizomes and storing them in a dry, cool place until spring.
Post-Winter Cleanup Before New Growth
In late winter or early spring, before new shoots appear, do a final cleanup. Remove any remaining dead foliage or debris from last season's growth. This prevents pests and diseases from overwintering in your garden bed.
Inspect the area for any signs of rot or pest damage. If you stored rhizomes, replant them about 2 inches deep in well-draining soil. Water lightly after planting to help settle the soil around the rhizomes. You'll see new shoots breaking through the soil within 2-3 weeks, signaling it's time to start the cycle again.
Tips & tricks for perfect canna plant pruning
These simple strategies will help you maintain healthy cannas with minimal effort while avoiding common pruning mistakes that can stress your plants.
Tool Preparation: Always disinfect your pruning tools with rubbing alcohol before and after each use. Canna plants are susceptible to bacterial and fungal infections, especially when you're cutting through old growth. I've seen cannas develop rot just because dirty tools introduced pathogens during pruning—don't make that mistake. Sterilizing tools also prevents cross-contamination between different plant varieties in your garden.
Pruning Timing: Pay close attention to the weather forecast when planning your early spring pruning in Step 1. Aim to prune on a day when temperatures are expected to stay above freezing for at least 48 hours after you cut back the stalks. New shoots are particularly vulnerable to frost damage, and you want them to establish roots before cold snaps hit. In Step 3, wait until nighttime temperatures consistently stay above 50°F before your late summer pruning—this gives the plant time to harden off before dormancy.
Mulching Technique: When applying mulch in Steps 1 and 3, create a slight depression around the base of the plant before adding the mulch. This helps prevent water from pooling against the stems, which can cause rot. I've found that using shredded hardwood mulch works better than bark chips because it breaks down more slowly and provides better insulation. Spread the mulch in a 2-inch thick layer for spring and 3-inch layer for fall, keeping it about 2 inches away from the plant stems to maintain proper airflow.
Fertilizer Application: After your mid-summer pruning in Step 2, don't rush to fertilize immediately. Wait until you see new leaf growth emerging (usually within 7-10 days) before applying your balanced fertilizer. This ensures your plant has already started redirecting energy to new growth. I recommend using a slow-release fertilizer rather than quick-release options, as it provides more consistent nutrition without causing sudden growth spurts that can stress the plant before winter.
Pro Tips for Canna Plant Pruning
- These simple strategies will help you maintain healthy cannas with minimal effort while avoiding common pruning mistakes that can stress your plants.
- Tool Preparation: Always disinfect your pruning tools with rubbing alcohol before and after each use.
- Pruning Timing: Pay close attention to the weather forecast when planning your early spring pruning in Step 1.
Frequently asked questions
Got questions about keeping your Canna plants thriving with the right pruning? Here are some of the most common ones—plus expert answers to help you trim like a pro!
When is the best time to prune canna plants for maximum blooms?
Prune your canna plants three times a year: early spring (to encourage new growth), mid-summer (after flowering), and late fall (to prep for dormancy). Avoid heavy pruning during extreme heat or cold—stick to mild temperatures (50–80°F) for best results.
How do I know if I’m pruning too much or too little?
Too much pruning = stunted growth or fewer blooms. Too little = leggy, overcrowded plants. Aim to remove 1/3 of the plant’s height per trim, focusing on yellow, damaged, or crossing stems. If your canna looks too bare after pruning, you’ve gone overboard!
Can I prune canna plants in winter, or should I wait until spring?
If you’re in a frost-free zone, light pruning (removing dead foliage) is fine in winter. But in colder climates, wait until spring (after the last frost) to avoid stressing the plant. In fall, cut back ⅔ of the plant and mulch heavily to protect roots.
What should I do with the cuttings after pruning?
Don’t toss those cuttings! Root them in water or moist soil to propagate new plants. For best success, use 4–6 inch stems with at least one node (where leaves meet the stem). Keep them in bright, indirect light until roots form (2–4 weeks).
My canna leaves are turning brown after pruning—what’s wrong?
Brown leaves post-pruning are usually normal (the plant is adjusting), but excessive browning could mean over-pruning, underwatering, or fungal stress. Ensure your canna gets 1–2 inches of water weekly and avoid pruning during humid or rainy conditions to prevent rot.
Wrapping up and next steps
Mastering canna plant pruning is your ticket to lush, vibrant foliage year-round! By following the three seasonal trims—spring, summer, and fall—you’ll encourage healthier growth, prevent overcrowding, and keep your garden thriving. With the right tools, timing, and techniques, you’re well on your way to becoming a pruning pro. 🌿✨
Ready to take the next step? Grab your shears and give your cannas a fresh trim this weekend! For extra inspiration, check out before-and-after photos of pruned cannas or join gardening forums to share your progress. Happy pruning!