
Shrubs
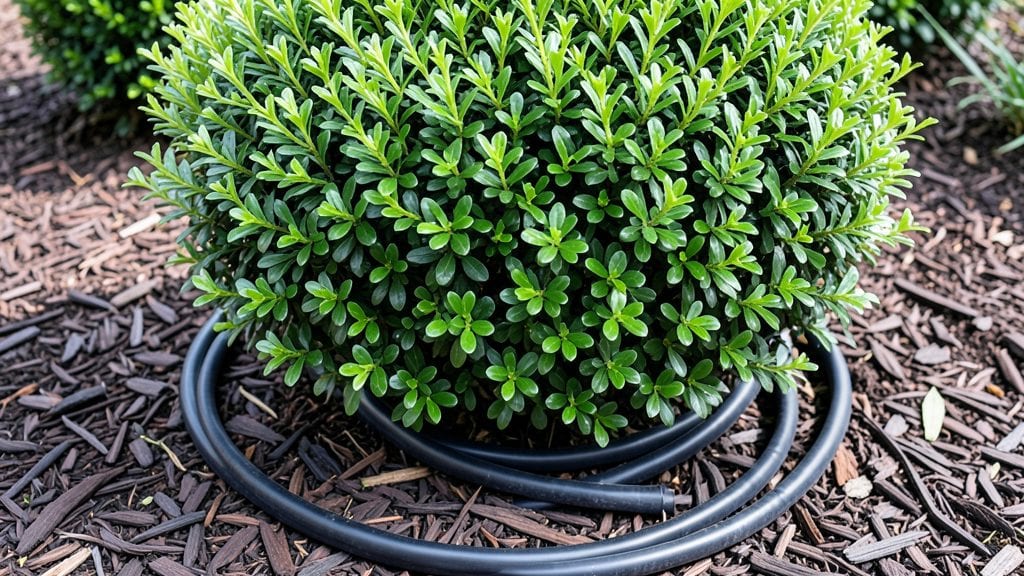
Boxwood foundation planting creates that polished, inviting look homeowners crave—where structure meets elegance without needing constant upkeep. I’ve designed front yards where neatly clipped boxwoods frame walkways and anchor flower beds, giving a timeless curb appeal that holds up for decades.
The secret isn’t just in the pruning; it’s in spacing them 12–18 inches apart so they fill in naturally while leaving room for seasonal interest plants to shine.
Start with dwarf or semi-dwarf varieties like ‘Green Velvet’ or ‘Winter Gem’ for smaller spaces, or ‘American Holly’ for a bolder, native look. Pair them with spring bulbs, ornamental grasses, or low-growing perennials to add texture and color without competing for attention.
Most boxwoods thrive in partial shade, making them perfect for northern exposures where other shrubs struggle.
Once established, they’re nearly maintenance-free—just a light trim twice a year keeps them tidy. The payoff? A front yard that looks freshly landscaped year-round, with that structured yet welcoming vibe that real estate agents love. Here’s how to get that same polished look without the fuss.
Works for traditional colonial homes, modern farmhouses, or even urban front yards with limited space. The key is balancing their evergreen presence with plants that complement their shape and color. Let’s make your foundation planting stand out—literally.
📚 In This Guide
- What you need
- Instructions
- Tips and common mistakes
- Wrapping up and next steps
What you need
- ● Boxwood plants: 3–5 per linear foot (depending on desired spacing; standard spacing is 2–3 ft apart). Choose Buxus sempervirens (common boxwood) or Buxus microphylla (dwarf varieties for smaller foundations).
- ● Topsoil or garden soil: 2–3 cubic yards (enough to fill planting holes to the root flare). Amend with compost for better drainage.
- ● Organic mulch: 2–3 inches of shredded bark or pine straw (covers the entire planting area).
- ○ Slow-release fertilizer: 10-10-10 or 12-12-12 (1 lb per 100 sq ft). Optional: Add mycorrhizal fungi to boost root health.
- ● Tools: Shovel or spade (for digging)
- ● Garden trowel (for precision planting)
- ● Wheelbarrow (for soil/mulch transport)
- ● Measuring tape or string line (to mark plant spacing)
- ● Gloves and knee pads (for comfort!)
- ● Pruning shears: Bypass pruners (for shaping after planting).
- ● Erosion control fabric: If planting on a slope, use landscape fabric to prevent soil runoff.
- ● Drip irrigation system: For consistent moisture (especially in hot climates).
- ● Edging material: Metal or plastic edging to define the planting bed neatly.
- ● Slow-release plant food: Osmocote or similar (applied annually for extra vigor).
- ● Decorative stones: Gravel or pavers for a polished, modern look around the base.
Step-by-step instructions for boxwood foundation planting
Here's how to create a polished, long-lasting foundation border that frames your home beautifully.
Plan the Layout and Spacing
Boxwoods thrive in symmetrical arrangements, so measure your foundation first. For a classic look, space plants 18-24 inches apart along the length of the house, with 3-4 feet between rows if creating a multi-layered hedge. I always sketch the design on graph paper—this prevents uneven gaps or overcrowding later. Consider mature size: standard boxwoods reach 3-4 feet tall and wide, so plan accordingly for smaller varieties like 'Green Velvet' or larger ones like 'American Holly.'
Mark planting spots with stakes or spray paint. A level string line ensures perfect alignment—boxwoods grow slowly, so any initial crookedness becomes permanent. I like to step back every few feet to check the visual flow from the street, driveway, and front door. This is the moment that matters: a well-planned layout saves hours of corrections later.
Prepare the Soil and Planting Holes
Boxwoods prefer well-draining, slightly acidic soil with a pH of 6.0-7.0. Test your soil first—amend heavy clay with 2-3 inches of compost mixed into the top 6 inches of native soil. For sandy soil, incorporate 1 part peat moss into the planting hole. Dig holes twice as wide as the root ball but no deeper—boxwoods hate sitting in soggy soil.
Loosen the roots of container-grown plants by gently teasing them apart at the bottom. Place each boxwood in its hole so the top of the root ball sits 1 inch below the surrounding soil line—this prevents crown rot. Fill the hole with native soil mixed with 1 cup of slow-release fertilizer (like 10-10-10) to encourage strong root establishment. Water deeply to settle the soil and eliminate air pockets.
Plant and Stake for Support
Press the soil firmly around the root ball with your hands, creating a slight basin to hold water. Mulch with 2-3 inches of shredded bark, keeping it 6 inches away from the trunk to prevent rot. I avoid dyed mulch—it can alter soil pH over time. For newly planted boxwoods, install 2-3 stakes per plant at a 45-degree angle, tying them loosely with soft fabric strips. This prevents wind damage while roots establish, usually within 4-6 weeks.
Water immediately after planting to reduce transplant shock. Give each plant 1 gallon of water to ensure the root ball and surrounding soil are thoroughly moistened. Avoid overhead watering—it can spread disease. Instead, use a soaker hose or water at the base. This step ensures your boxwoods start with strong hydration and minimal stress.
Prune and Shape for Structure
Prune immediately after planting to remove any broken branches or yellowing leaves. Use clean, sharp pruners to make cuts at a 45-degree angle just above a leaf bud. For a formal look, shape the top into a rounded dome while keeping the sides straight. I like to step back frequently to check symmetry—boxwoods respond well to light pruning, so don’t overdo it. Remove no more than 1/3 of the plant’s foliage in the first year.
Fertilize lightly in late spring with a balanced, slow-release fertilizer to support new growth. Boxwoods are drought-tolerant once established, but young plants need 1 inch of water weekly during the first growing season. Real talk: Overwatering is the biggest mistake here—it leads to root rot and weak stems. Always check soil moisture before watering.
Maintain Long-Term Health and Appearance
Prune boxwoods twice a year: once in early spring to shape for the season and again in late summer to clean up any winter damage. Avoid heavy pruning in fall—it stimulates tender new growth that won’t harden off before winter. I also recommend annual soil tests to monitor pH and nutrient levels. If needed, apply a low-nitrogen fertilizer in early spring to promote dense foliage.
Watch for common pests like boxwood leafminer or boxwood blight. If you spot yellowing leaves or sawdust-like frass, treat immediately with neem oil or insecticidal soap. For blight, remove infected leaves and apply a fungicide as a preventive measure. With proper care, your boxwood foundation will stay lush and structured for decades, providing timeless curb appeal.
Tips & tricks for perfect boxwood foundation planting
A few strategic moves can transform your boxwood foundation from good to showstopping. These are the details that separate a basic planting from a landscape feature that stands the test of time.
Layout Precision: When sketching your design, use graph paper with each square representing 1 foot. This visual approach reveals spacing inconsistencies before you dig. I've found that marking planting spots with landscape paint rather than stakes creates a cleaner, more professional look when it's time to plant. Also, step back every 5 feet to check the visual flow—what looks perfect from 3 feet away might reveal awkward gaps from across the street.
Soil Science: The 6.0-7.0 pH range is critical, but don't stop at the test. Amend heavy clay soil with compost mixed into the top 6 inches, not just the planting hole. This creates a root-friendly environment beyond just where the plant sits. For sandy soils, I recommend adding 1 part peat moss to the planting hole mix—this improves water retention without creating soggy conditions. Remember, boxwood roots spread horizontally, so well-amended soil encourages strong lateral growth.
Watering Wisdom: That initial 1 gallon of water per plant should be your baseline, but don't treat it as a one-time event. For the first two weeks, water deeply every 3-4 days to encourage root establishment. The key is consistent moisture without waterlogging—boxwoods hate soggy roots. I use a soaker hose set on low for 20 minutes per section, which delivers just the right amount without wetting the foliage and spreading disease.
Pruning Strategy: When shaping your boxwoods, follow the "thirds rule"—never remove more than one-third of the foliage in any single pruning session. For formal hedges, I recommend using a string line as a guide to maintain perfect straight edges. And here's a pro tip: always prune just above a leaf bud at a 45-degree angle—this encourages new growth and creates a cleaner look. The rounded dome shape isn't just aesthetic; it helps water run off properly and reduces disease risk.
Pro Tips for Boxwood Foundation Planting
- A few strategic moves can transform your boxwood foundation from good to showstopping.
- Layout Precision: When sketching your design, use graph paper with each square representing 1 foot.
- Soil Science: The 6.0-7.0 pH range is critical, but don't stop at the test.
Frequently asked questions
Got questions about creating a stunning boxwood foundation planting? You’re not alone! Here are answers to the most common concerns—from timing to troubleshooting—to help you design with confidence.
When is the best time to plant boxwoods for a foundation?
The ideal time is early spring or fall (4–6 weeks before the first frost). This gives roots time to establish before extreme heat or cold. Avoid planting in summer—heat stress can stunt growth. For container-grown boxwoods, you can plant year-round (with proper watering), but spring/fall still offer the best success.
How far from the house should boxwoods be planted?
Plant boxwoods 12–18 inches away from the foundation (or per local building codes). This spacing prevents root intrusion into pipes or drainage systems while allowing airflow to reduce rot risk. Use landscape fabric under mulch (not touching the trunk) to deter weeds without suffocating roots.
Can I use other shrubs instead of boxwoods for a foundation?
Consider dwarf hollies, juniper, or viburnum for low-maintenance alternatives. Boxwoods excel for their neat shape and evergreen foliage, but drought-tolerant options like Lantana or Russian sage work well in arid climates. Match your choice to your climate, sunlight, and maintenance preferences.
Why are my boxwoods turning brown or crispy?
Brown edges or crispy leaves often signal underwatering, overwatering, or pest issues. Check soil moisture (top 1–2 inches should be dry); boxwoods prefer consistent moisture but hate soggy roots. Spider mites or boxwood leafminers can also cause browning. Treat with neem oil or insecticidal soap if pests are suspected.
How do I keep boxwoods shaped after planting?
Prune lightly in late winter or early spring to encourage dense growth. Use sharp shears to trim 1/3 of the new growth per year, avoiding "shearing" (which can harm foliage). For formal hedges, shape gradually—never cut into old wood. A light layer of mulch (2–3 inches) retains moisture and reduces weeds.
Wrapping up and next steps
Creating a boxwood foundation planting is a rewarding way to elevate your home’s curb appeal while adding lasting structure to your landscape. With the right variety, spacing, and care, these evergreens will thrive for decades, offering year-round beauty and privacy.
Whether you’re a seasoned gardener or just starting, the key is patience—watch your boxwoods grow into a lush, timeless border that enhances your home’s foundation.
Ready to get started? Sketch your design, gather supplies, and plant with confidence! Your future landscape will thank you. 🌿✨