Pruning
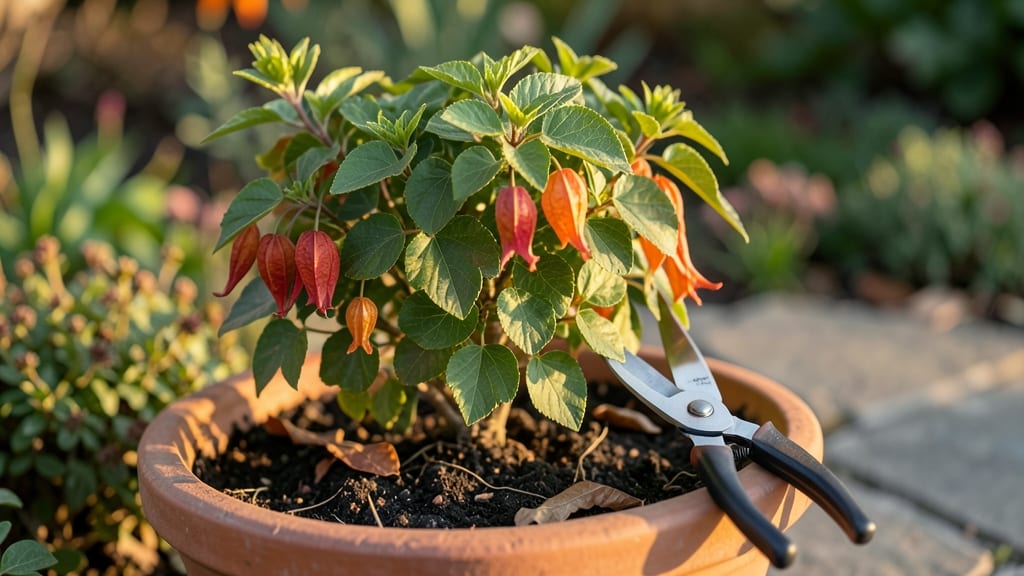
Pruning abutilon plants transforms them from scraggly survivors into showstopping bloomers that reward you with nonstop color. ✨ I’ve turned my once-lanky abutilons into lush, flowering powerhouses using just three strategic cuts each year—no fancy techniques, just smart timing and a pair of sharp shears.
The difference? Plants that stay compact, bloom like crazy, and look intentional even when you’re not fussing over them.
You’ll need three basic tools: pruning shears for clean cuts, gloves to avoid sticky sap, and a spray bottle for post-prune hydration. The real secret?
Pruning in late winter, mid-summer, and early fall—each cut serves a purpose, whether it’s shaping for winter dormancy or encouraging new growth for summer blooms.
Most gardeners over-prune in spring, which sends the plant into shock, but abutilons actually thrive when you let them rest before their big growth push.
After pruning, your abutilon will reward you with thicker stems, more flowers, and a shape that fits your space perfectly. The first flush of blooms after your summer cut is always the most dramatic—bright clusters that last for weeks.
Plus, better air circulation means fewer pests and healthier leaves. It’s the kind of transformation that makes you want to prune everything in your garden.
This method works whether you’re growing abutilons in pots on a patio or letting them sprawl in the garden bed. The key is consistency—stick to the three cuts, and your plants will thank you with year-round blooms and a bushier form.
Ready to see the difference? Grab your shears and let’s get started.
📚 In This Guide
- What you need
- Instructions
- Tips and common mistakes
- Wrapping up and next steps
What you need
- ● Pruning shears: Bypass pruners (sharp, clean, and sterilized with rubbing alcohol) for clean cuts. Avoid dull tools—abutilon stems bruise easily!
- ● Hand pruners or felco: For smaller stems or detailed trimming (ensure blades are 1/4"–3/8" long for precision).
- ● Gloves: Garden gloves (nitrile or leather) to protect from thorns and sap.
- ● Disinfectant: 70% isopropyl alcohol or a pruning sealant (like Pruning Wax) to prevent disease spread.
- ● Containers/bags: 2–3 small plastic bags or a bucket with water to collect clippings (for compost or propagation!).
- ○ Sharpie or label markers: Optional but handy for marking cuts if you’re propagating.
- ● Loppers: For thick, woody stems (if your abutilon is mature and leggy).
- ● Horticultural oil: For deep-cleaning tools between uses (prevents rust and bacteria).
- ● Rooting hormone: If you plan to propagate cuttings (speeds up root growth!).
- ● Plant tie or twine: To secure new growth if your plant is top-heavy post-prune.
- ● Notebook: Jot down pruning dates or notes on your plant’s response!
Instructions for pruning abutilon plants
Here's how to keep your abutilon thriving with three precise cuts that encourage lush growth and nonstop blooms.
✂️ Step 1: Early Spring Cleanup Cut
Start by removing any dead, damaged, or crossing branches in late winter or early spring, just as new growth begins. I use sharp, sterilized pruning shears to make clean cuts at a 45-degree angle, about ¼ inch above a leaf node or outward-facing bud. This prevents water from pooling and reduces disease risk.
Focus on shaping the plant into an open, vase-like form—abutilons love airflow. Cut back leggy stems by one-third to encourage bushier growth. Watch for new shoots emerging within 2-3 weeks; these signal successful pruning. If you see yellowing leaves, that's a sign you've pruned too late—wait until spring's first warm days.
✂️ Step 2: Mid-Summer Blooming Boost
After the first flush of flowers fades, give your abutilon a light trim to promote a second round of blooms. Pinch back the tips of new growth by ½ inch to encourage branching. Remove any spent blooms by cutting just above the next leaf node—this prevents seed formation and redirects energy into new flowers.
I always prune on a dry, sunny morning to minimize stress. If you notice stems growing too long or bare at the bottom, cut them back by one-third to maintain a balanced shape. You'll see fresh buds forming within 3-4 weeks—this is your reward for timely pruning. Avoid heavy cuts now; abutilons bloom on current year's growth, so less is more.
✂️ Step 3: Late Fall Rejuvenation Cut
In fall, after the final blooms drop, give your abutilon a harder prune to prepare for winter. Cut back all stems by half their length, shaping into a compact form. Remove any weak or woody growth that won't recover. This isn't about aesthetics—it's about forcing the plant to focus energy on strong new growth in spring.
Sterilize your tools with rubbing alcohol before and after to prevent fungal spread. If your abutilon is in a container, reduce watering slightly after pruning—overhydration can stress the plant. You'll see fresh green growth emerging from the base in 4-6 weeks, signaling the plant's readiness for spring's full bloom cycle.
⏰ Step 4: Year-Round Maintenance Pruning
Between the big cuts, keep your abutilon tidy by removing spent blooms and leggy growth as you notice them. I call this "little and often" pruning—it keeps the plant looking polished and encourages continuous flowering. Use clean scissors for small cuts to avoid tearing stems.
Watch for new growth at the leaf nodes after each prune; this is your cue that the plant is responding well. If you see bare spots developing, it's time for another light trim to fill in gaps. Abutilons are forgiving, but consistency is key—prune when you see issues, not when they become problems.
Tips & tricks for pruning abutilon plants
Mastering the art of abutilon pruning transforms a struggling plant into a blooming powerhouse—here's how to get it right every time.
Timing is Everything: The 2-3 weeks window after your early spring cleanup cut is critical for observing new growth. If you don't see fresh shoots emerging within this timeframe, you've likely pruned too late—wait until next spring's first warm days when buds begin to swell. I've learned this the hard way after seeing yellowing leaves appear when pruning was delayed.
The Angle Matters: That 45-degree angle cut in Step 1 isn't just for looks—it prevents water from pooling in the wound, which dramatically reduces disease risk. Use sharp, sterilized pruning shears to make clean cuts, and always cut just above a leaf node or outward-facing bud. This simple technique ensures your plant directs energy to new growth rather than wasting it on healing wounds.
Pinching for Profusion: The ½ inch pinch in Step 2 might seem insignificant, but it's what triggers that second flush of blooms. This technique stimulates branching by interrupting apical dominance—the plant's natural tendency to grow upward. I've seen abutilons go from sparse bloomers to flowering machines after consistently applying this light trim every summer.
Fall Prep Pays Off: The half-length cut in Step 3 might seem drastic, but it's the secret to vigorous spring growth. This hard prune forces the plant to redirect its energy to the strongest stems at the base. I've noticed plants that receive this fall treatment often bloom earlier and more abundantly the following season. Just remember to reduce watering slightly after pruning—overhydration can stress the plant during its recovery period.
Pro Tips for Pruning Abutilon Plants
- Mastering the art of abutilon pruning transforms a struggling plant into a blooming powerhouse—here's how to get it r...
- Timing is Everything: The 2-3 weeks window after your early spring cleanup cut is critical for observing new growth. ...
- The Angle Matters: That 45-degree angle cut in Step 1 isn't just for looks—it prevents water from pooling in the woun...
Frequently asked questions
Got questions about pruning your Abutilon (aka "Finger-of-Buddhism" or "Chinese Lantern")? You’re not alone! Here are answers to the most common concerns—so you can keep those blooms coming year-round.
When is the best time to prune Abutilon for maximum blooms?
Prune your Abutilon twice a year: early spring (just as new growth starts) to shape the plant and late summer (after the first flush of blooms) to encourage a second round. Light trims can happen year-round, but avoid heavy cuts in winter when growth slows. Pro tip: Pinch back tips in spring to promote bushier growth!
How do I know if I’m pruning too much or too little?
Too much? You’ll see bare stems or leggy growth (long, sparse branches). Too little? Your plant may get overcrowded or woody with fewer blooms. Aim to remove 1/3 of the plant’s height in spring and lightly trim spent flowers in summer. Think "haircut"—neat, not drastic!
Can I propagate my Abutilon from pruned cuttings?
Abutilon cuttings root easily. Just take 4–6 inch healthy stems (just below a leaf node), dip in rooting hormone, and plant in moist potting mix. Keep humid (use a plastic bag) and in bright, indirect light. Roots form in 2–4 weeks—perfect for free plants!
What if my Abutilon looks sad after pruning?
Don’t panic! Abutilon often rebounds quickly. If leaves yellow or drop, check for overwatering (let soil dry slightly) or underwatering (they’re drought-tolerant!). Boost blooms by fertilizing lightly after pruning (use a balanced 10-10-10). With time, your plant will bounce back—bushier and bloomier!
Do I need to prune Abutilon in winter?
Only if needed! Abutilon is semi-dormant in winter, so avoid heavy pruning—focus on removing dead or diseased branches only. If indoors, reduce watering but keep light consistent. Outdoors in cold zones, protect from frost (they’re tender perennials). Light trims in late winter can prep for spring growth!
Wrapping up and next steps
Pruning your abutilon plants doesn’t have to be intimidating—it’s all about strategic timing and technique! With just three key cuts—spring shaping, summer maintenance, and fall cleanup—you’ll keep your plants lush, blooming, and full of life.
Remember, sharp tools, clean cuts, and a little patience go a long way in encouraging vibrant growth.
Now that you’re armed with the know-how, grab those shears and get pruning! 🌿✂️ Start with one plant at a time, and soon, your abutilon will reward you with year-round color. Want to take it further? Try experimenting with propagating cuttings—you might just expand your garden for free!