Pests
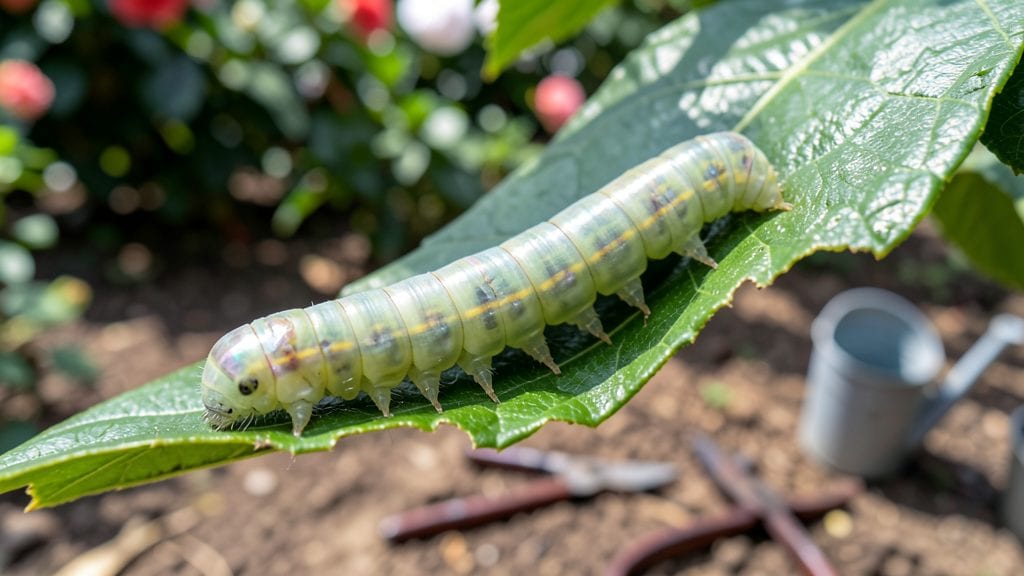
When hibiscus worms turn your lush blooms into skeleton leaves overnight, panic sets in—but there’s a humane way to save your plant. 🌿 I’ve wrestled with these pests in my own garden, and what I learned changed how I protect my hibiscus forever.
The key isn’t just sprays or traps; it’s understanding their life cycle so you can outsmart them before they strike again.
The damage tells the story: chewed leaves, silky webbing, and those telltale white grubs tunneling through roots. Most gardeners grab the strongest pesticide first, but that kills beneficial insects too.
Instead, start with neem oil sprays (mix 1 tablespoon per quart of water) or row covers to smother adult moths before they lay eggs. Even a shallow trench of diatomaceous earth around the base deters them—no harsh chemicals needed.
Your hibiscus can bounce back faster than you think. Prune damaged foliage immediately to redirect energy to new growth, and boost soil health with compost tea to strengthen roots. Within weeks, you’ll see fresh leaves unfurling, and the blooms will return—brighter and more abundant than before.
The secret? Catching the infestation early and giving your plant the support it needs to recover.
This isn’t just about one season—it’s about building a garden where hibiscus worms can’t take hold. Rotate plants yearly, plant marigolds nearby (their scent confuses the moths), and keep the soil moist but not soggy. Those simple shifts make all the difference. Let’s get your hibiscus thriving again—naturally.
Root Causes of Worm Infestations
Understanding why worms target your hibiscus plants is the first step to preventing and treating the issue effectively. These tiny pests don’t just appear out of nowhere—they’re drawn to specific conditions that make your plants a perfect buffet.
Let’s break down the real culprits behind these unwelcome visitors, so you can address the problem at its source.
Worms, particularly hibiscus borers or root-knot nematodes, thrive when plants are weak. Overcrowding reduces airflow, creating a damp, shaded environment that worms love. Additionally, stressed plants—whether from poor soil, lack of nutrients, or improper watering—emit chemical signals that attract pests looking for an easy meal.
- Why it happens:
- Poor spacing between hibiscus plants limits sunlight and air circulation, trapping moisture near the roots.
- Nutrient deficiencies (like low nitrogen or potassium) weaken the plant’s defenses, making it more susceptible to attacks.
- Overwatering or underwatering disrupts root health, making plants vulnerable to worm infestations.
Actionable fix: Prune overgrown branches, space plants 3–5 feet apart, and ensure well-draining soil to reduce stress.
Worms, especially hibiscus leaf miners and root-feeding grubs, prefer warm, humid environments. If your hibiscus is growing in soggy soil or a shaded area with high humidity, you’ve created a worm paradise.
- Why it happens:
- Excess moisture (from overwatering or poor drainage) keeps soil warm and soft, perfect for worm larvae to burrow and feed.
- High humidity (common in tropical climates or greenhouses) slows evaporation, prolonging damp conditions that worms adore.
- Temperature fluctuations—especially warm nights—encourage worm activity, as they’re most active when soil temps hover around 70–85°F (21–29°C).
Actionable fix: Water deeply but infrequently, improve drainage with compost or sand, and avoid mulching too heavily around the base.
Worms often hitch a ride on decaying organic matter or infested soil. If your hibiscus is planted in garden beds with old compost, leaf litter, or untreated mulch, you’re essentially rolling out the red carpet for them.
- Why it happens:
- Decomposing plant material (like fallen leaves or grass clippings) attracts worm eggs and larvae.
- Contaminated soil from previous infestations may still harbor dormant worm cysts or eggs.
- Lack of beneficial microbes in poor soil weakens the plant’s ability to fend off pests naturally.
Actionable fix: Sterilize soil with solarization (covering beds with clear plastic in the sun for a few weeks) or use neem cake as a natural soil amendment to deter worms.
Some worms, like hibiscus borers, follow seasonal patterns tied to plant growth cycles. For example:
- Spring and early summer bring new shoots—prime targets for worms.
- Fall sees larvae pupating in soil, waiting to emerge when conditions are right.
Why it happens:
- New growth is tender and nutrient-rich, making it a worm magnet.
- Mild winters in warm climates allow worms to survive year-round, leading to persistent infestations.
Actionable fix: Monitor plants closely during peak growth seasons and use row covers or beneficial nematodes as a preventive measure.
Some plants unintentionally invite worms by sharing the same pests. For instance, if your hibiscus is near tomatoes, peppers, or citrus trees, worms from those plants may jump ship to your hibiscus.
Why it happens:
- Shared pest species (like root-knot nematodes) don’t discriminate—they’ll feed on whatever’s easiest.
- Pollinator-friendly flowers (like marigolds) can sometimes attract worm allies, like ants, which protect worms in exchange for honeydew.
Actionable fix: Plant worm-repelling companions like basil, garlic, or marigolds (though some marigolds attract pests—choose pest-resistant varieties).
Many worm infestations coincide with fungal infections (like powdery mildew or root rot). Worms often target plants already compromised by fungi, which weaken defenses further. Always check for fungal signs (white powder, black spots, or mushy roots) before blaming worms alone.
By tackling these root causes, you’ll not only remove existing worms but also break the cycle that keeps them coming back. Next, we’ll cover humane removal methods to save your hibiscus without harming the ecosystem. 🌿
Quick Fixes for Wormy Hibiscus
If your hibiscus plant is under siege by worms, don’t panic—there are effective, humane ways to remove them and restore your plant’s health. Below, we break down the most common causes of worm infestations (like aphids, caterpillars, or spider mites) and pair them with practical, step-by-step solutions.
We’ve also included prevention tips to keep your hibiscus thriving long-term.
Signs: Jagged holes in leaves, frass (tiny black droppings), or worms hiding under foliage.
How to Remove Them
- 🔥 Handpick the Pests
- Wear gloves and inspect leaves early in the morning when worms are sluggish.
- Gently pluck them off and drop them in soapy water (1 tbsp dish soap + 1 gallon water) to kill them instantly.
- 🍳 Bacillus Thuringiensis (Bt) Spray
- A natural, organic pesticide that targets caterpillars but is safe for bees and beneficial insects.
- Mix 1 tsp Bt per quart of water and spray evenly on both sides of leaves (especially undersides).
- Reapply every 5–7 days until worms disappear.
- 👨🍳 Neem Oil Treatment (Preventative & Repellent)
- Mix 1 tbsp neem oil + 1 tsp mild soap + 1 quart water.
- Spray at dusk (avoid direct sunlight to prevent leaf burn).
- Reapply weekly to deter future infestations.
💡 Prevention Tips
- 🌡️ Mulch Strategically: Use straw or wood chips (not thick layers) to discourage cutworms from hiding near the soil.
- ✨ Companion Planting: Grow marigolds or basil nearby—their strong scent repels pests.
- 🎯 Prune Regularly: Remove damaged leaves and dispose of them in a sealed bag (not compost).
Signs: Sticky residue (honeydew), curled leaves, or tiny webs on undersides.
How to Treat Them
- 🔥 Blast Them Off with Water
- Use a strong stream of water from a hose to knock aphids off leaves.
- Do this 2–3 times a week for severe infestations.
- 🍳 Homemade Soap Spray
- Mix 1 tbsp castile soap + 1 quart water in a spray bottle.
- Shake well and spray directly on pests (avoid overspraying flowers).
- Repeat every 3–4 days until gone.
- 👨🍳 Introduce Beneficial Insects
- Ladybugs and lacewings eat aphids naturally. Purchase them online or from garden centers.
- Release them in the evening when they’re most active.
💡 Prevention Tips
- 🌡️ Keep Plants Healthy: Overwatering attracts pests—water at the base and avoid wetting leaves.
- ✨ Yellow Sticky Traps: Place yellow cards coated in petroleum jelly near the plant to catch flying pests.
- 🎯 Quarantine New Plants: Inspect every new addition before bringing it near your hibiscus.
Signs: Stunted growth, yellowing leaves, or galls (lumpy roots) when you dig up the plant.
How to Fix It
- 🔥 Solarization (For Severe Cases)
- Only for warm climates: Water the soil deeply, then cover it with clear plastic for 4–6 weeks to bake out nematodes.
- Remove plastic and replant after 2 weeks to let the soil cool.
- 🍳 Organic Nematode Control
- Marigold Companion Planting: Grow French marigolds nearby—they release a chemical that repels nematodes.
- 👨🍳 Coffee Grounds: Sprinkle used coffee grounds around the base (contains nematicidal compounds).
- 👨🍳 Replace Infested Soil
- If nematodes are widespread, remove the top 6 inches of soil and replace with sterilized potting mix or sand-amended soil.
💡 Prevention Tips
- 🌡️ Crop Rotation: Avoid planting hibiscus (or other susceptible plants) in the same spot for 3+ years.
- ✨ Beneficial Fungi: Apply mycorrhizal fungi to improve root health and resilience.
- 🎯 Test Your Soil: Use a home nematode test kit (available online) to monitor levels before symptoms appear.
Once you’ve removed the pests, help your plant recover with these quick recovery tips:
- 💡 Trim Damaged Foliage: Use sterilized pruners to cut off chewed or yellowing leaves—this redirects energy to new growth.
- 🌡️ Boost Nutrients: Feed with a balanced fertilizer (10-10-10) or compost tea to strengthen recovery.
- ✨ Increase Airflow: Space plants 3–4 feet apart to reduce humidity (pests love damp, crowded conditions).
- 🎯 Monitor & Repeat: Check leaves daily for 2 weeks—early detection prevents reinfestation.
Remember: The key to long-term success is consistency. Combine removal methods with preventative care, and your hibiscus will bounce back stronger than ever! 🌺💪
Frequently asked questions
What are the most common types of worms attacking hibiscus plants?
Hibiscus plants often face root-knot nematodes (microscopic worms causing galls on roots), hibiscus borers (larvae tunneling into stems), and leaf miners (creeping insects leaving serpentine trails). The first signs are usually wilting, yellowing leaves, or chewed foliage—check soil and leaf undersides for clues.
Can I use chemical pesticides safely on hibiscus?
Chemical pesticides like imidacloprid or carbaryl can work but harm beneficial insects and may leave residues. For hibiscus, opt for neem oil (1 tbsp per quart of water) or Bacillus thuringiensis (Bt)—both are organic, target-specific, and safer for pollinators.
How do I know if my hibiscus has a worm infestation?
Look for chewed leaves, silky webbing, or tiny white grubs in soil. Root-knot nematodes create lumpy roots, while borers leave sawdust-like frass near entry holes. Dig gently to inspect roots or flip leaves to spot larvae.
Will companion planting really keep worms away?
Planting marigolds (releases nematicidal compounds) or basil (repels pests with scent) nearby disrupts worm life cycles. Avoid tomatoes or citrus, which attract shared pests. Rotate crops yearly to break infestation cycles.
How long does it take for hibiscus to recover after worm damage?
With immediate action (pruning damaged leaves, applying neem oil, and improving soil health), hibiscus can show new growth in 2–4 weeks. Severe cases may take 6–8 weeks